
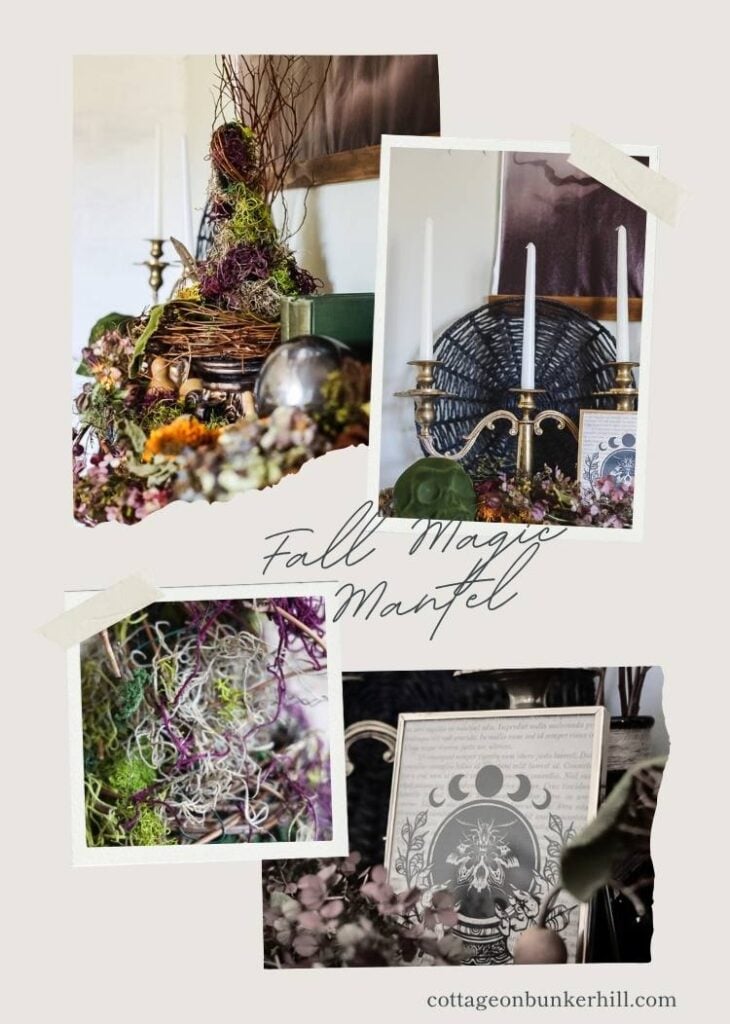
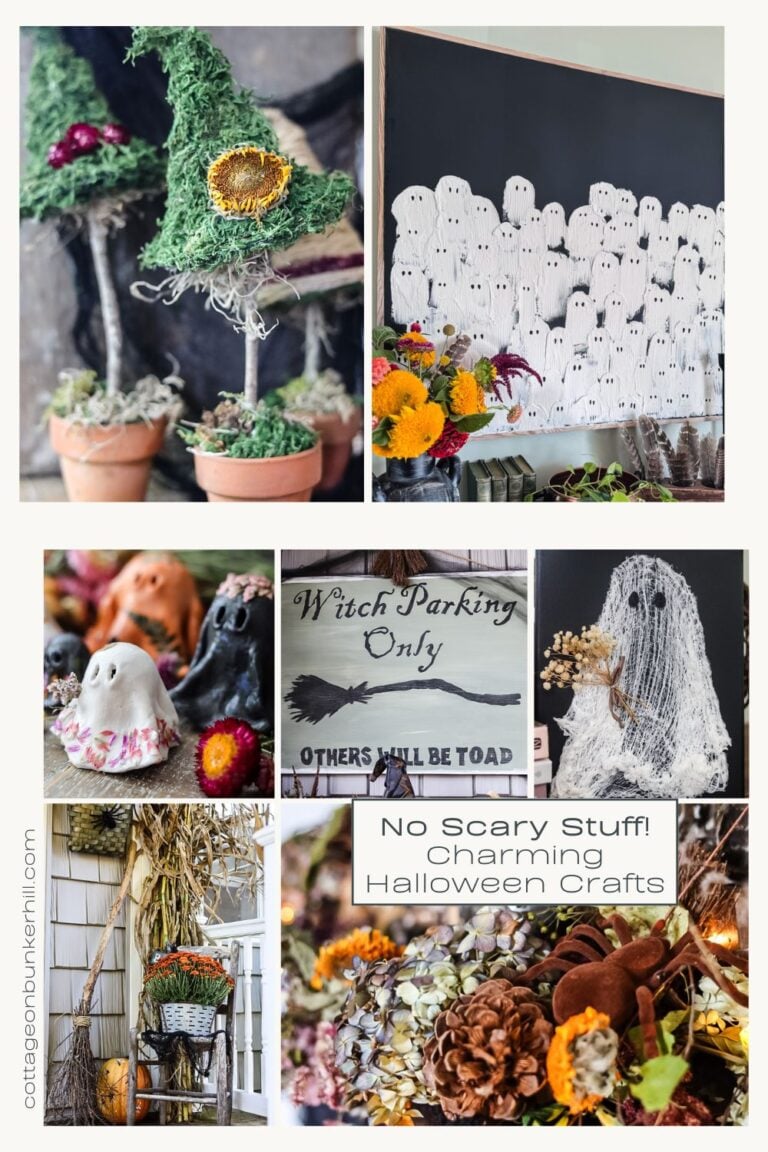
Move over, spooky specters, there’s a new kind of magic in town! This Fall, I wanted to create a mantel that felt less “haunted house” and more “enchanted cottage.” Welcome to The Pretty Witch Project!
Where Natural Magic Lives: Tour My Witchy-Inspired Fall Mantel
I’ve always loved the whimsy and mystery of witchy aesthetics-think dried herbs, glowing orbs, and natural textures- but I wanted to keep things soft, elegant, and full of personal charm. So, I skipped the plastic bats and orange cobwebs and instead reached for hydrangeas from my garden, feathers, moss, and a little bit of looking-glass paint to bring this mystical vision to life.
The result is a cozy, inviting mantel perfect for Autumn, whether you’re celebrating Halloween or simply embracing the magic of the season. I’ll show you how I made the dried floral garland, transformed a tinsel hat into a naturalistic centerpiece, created a DIY crystal ball, and brought it all together into one gorgeous, gram-worthy display. Let’s make some magic!
The Inspiration Behind the Mantel
When it comes to Fall and especially Halloween, I’ve always been drawn more to whispered magic than to spooky scares. You know what I mean? I love the idea of a quiet kind of enchantment: the glow of candlelight, the texture of dried botanicals, the charm of a well-loved crystal ball, and the storytelling beauty of a witchy aesthetic that feels earthy, elegant, and just a little bit mystical.
This year, I wanted my Fall mantel to reflect that! A space that feels cozy, intentional, and brimming with natural charm rather than rubber bats or synthetic cobwebs. I took inspiration from:
- Cottagecore simplicity: Using what I already had or could gather from nature.
- Vintage witchcraft: Think herbal folklore, celestial symbols, and magical tools presented beautifully.
- Soft seasonal tones: Dried flowers, mossy greens, dusty blues, and earthy browns.
The goal was elegance, not fright! A mantel that says “welcome” rather than “boo!” Whether you’re decorating for Halloween or just embracing the cozy shift in seasons, this look is all about intention, warmth, and a touch of DIY magic.
This post may contain affiliate links, which means we receive a small commission if you purchase through our links. See our disclaimer page for more information.
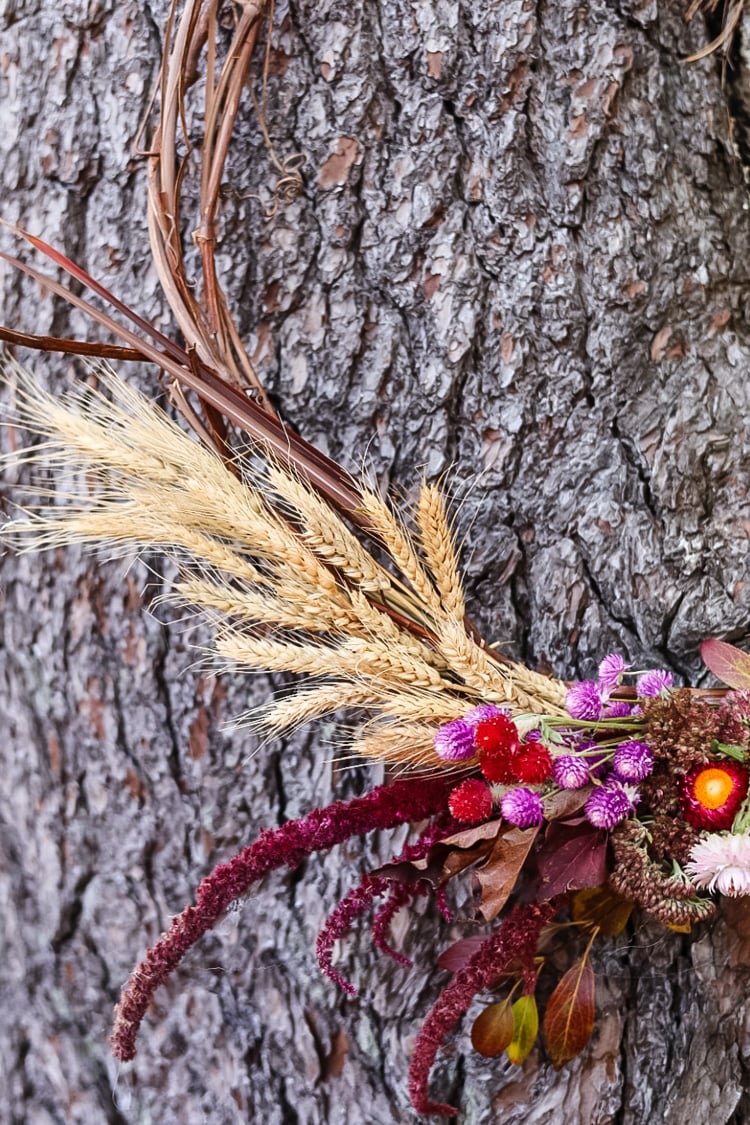
DIY #1: The Dried Floral & Greenery Garland
This garland is the heart of the mantel, and the best part? It cost me absolutely nothing! By foraging, gardening, and using what I had, I created a piece that’s full of texture, color, and natural charm.
Materials I Used:
- A long, flexible piece of grapevine (a lucky find from a local vineyard!)
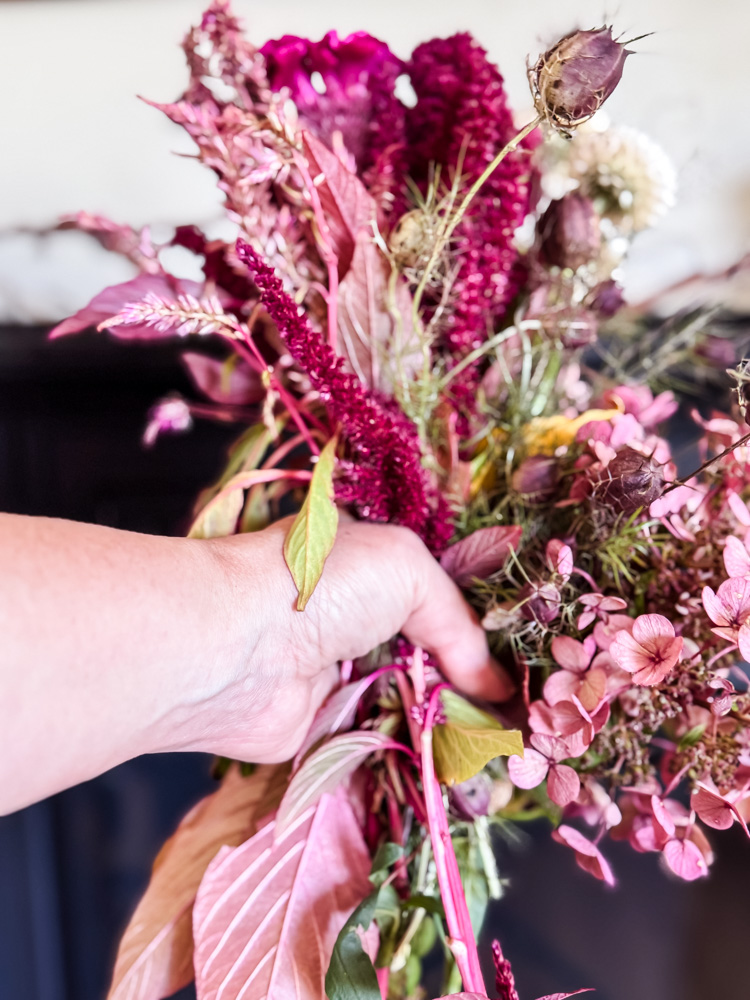
- Garden clippings: Birch branches with leaves, hydrangeas, amaranth, small sunflowers, nigella pods, and celosia
- Foraged elements: Pinecones from my woods
- Optional but magical: A string of battery-operated LED fairy lights
- Tool: Florist wire (or any thin, flexible wire) and scissors
How I Made It:
Create the Base:
I first placed a piece of Dollar Tree black creepy cloth across the mantel for a little bit of a Halloween vibe.
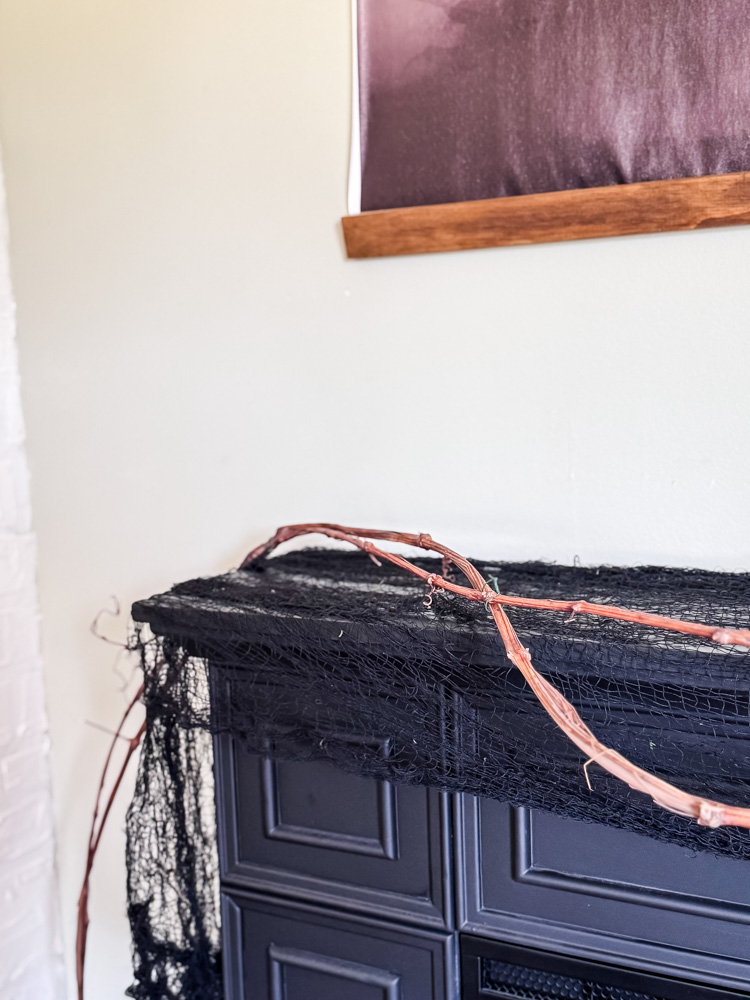
I started with the long piece of grapevine, shaping it into a gentle curve that would gracefully drape across the mantel. I intentionally made it slightly asymmetrical, allowing it to dip a bit lower on the left side for a more organic, flowing look.
Don’t have a friendly local vineyard? No problem! You can easily create a similar base using store-bought grapevine garland or even by foraging flexible branches from your own yard (willow, dogwood, or any other pliable stems work beautifully).
Add Twinkling Lights (Optional): For a touch of evening magic, I wove a string of battery-operated LED lights along the grapevine base before adding any flowers. This ensures the lights are hidden within the arrangement, ready to create a soft, enchanting glow.
Weave in Botanicals:
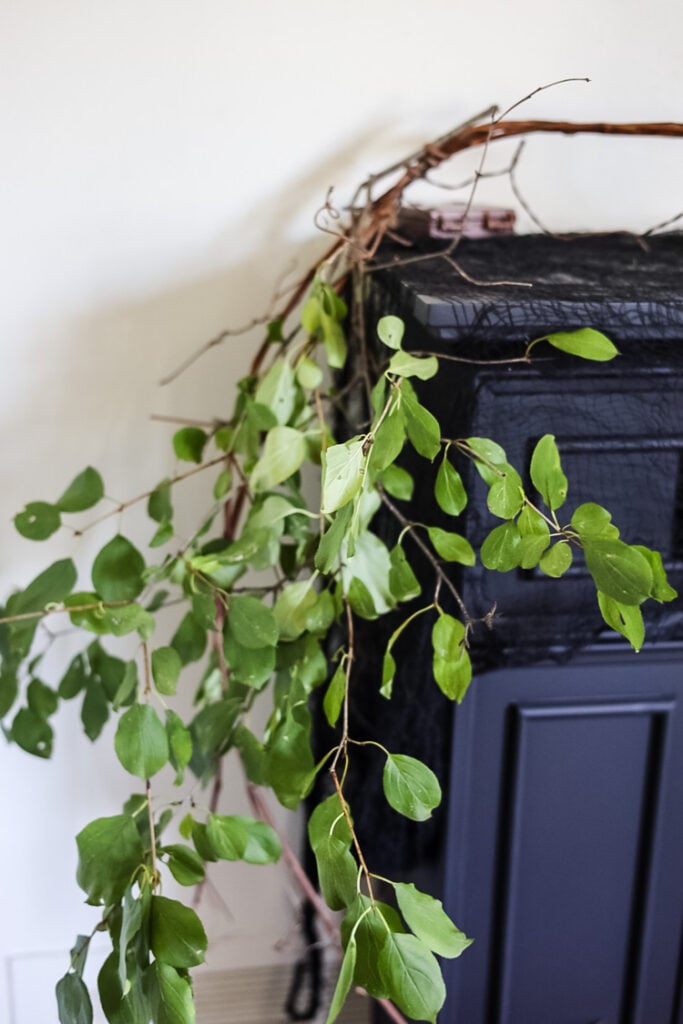
Working in sections, I began tucking and weaving my garden clippings into the grapevine. I started with the leafy branches for structure and greenery. The leaves will naturally dry out, but that will still look perfect on this witchy mantle!
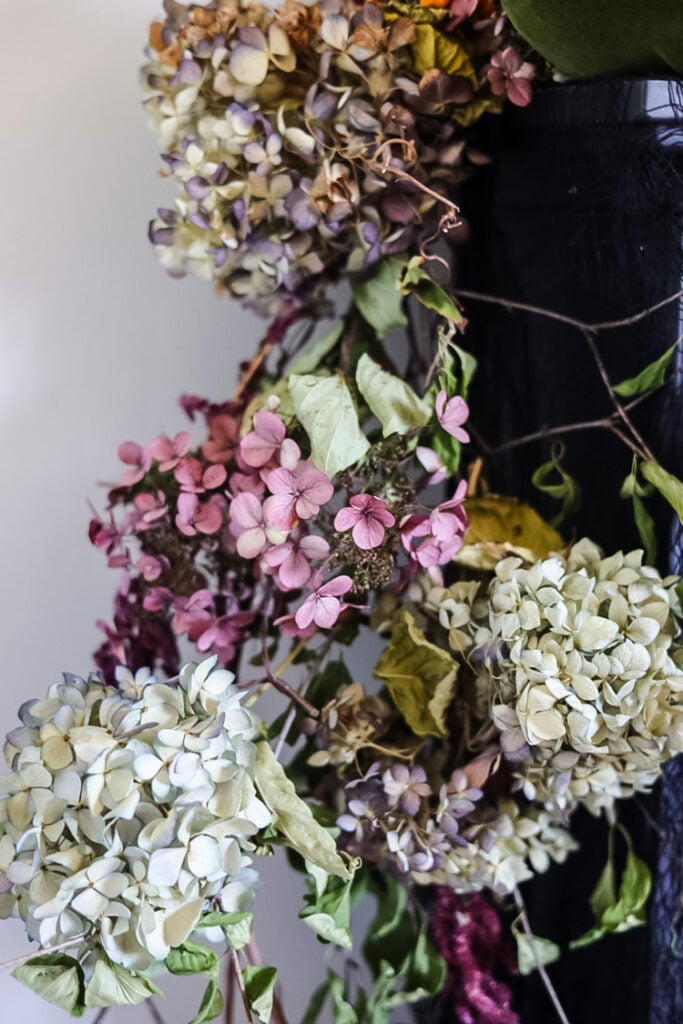
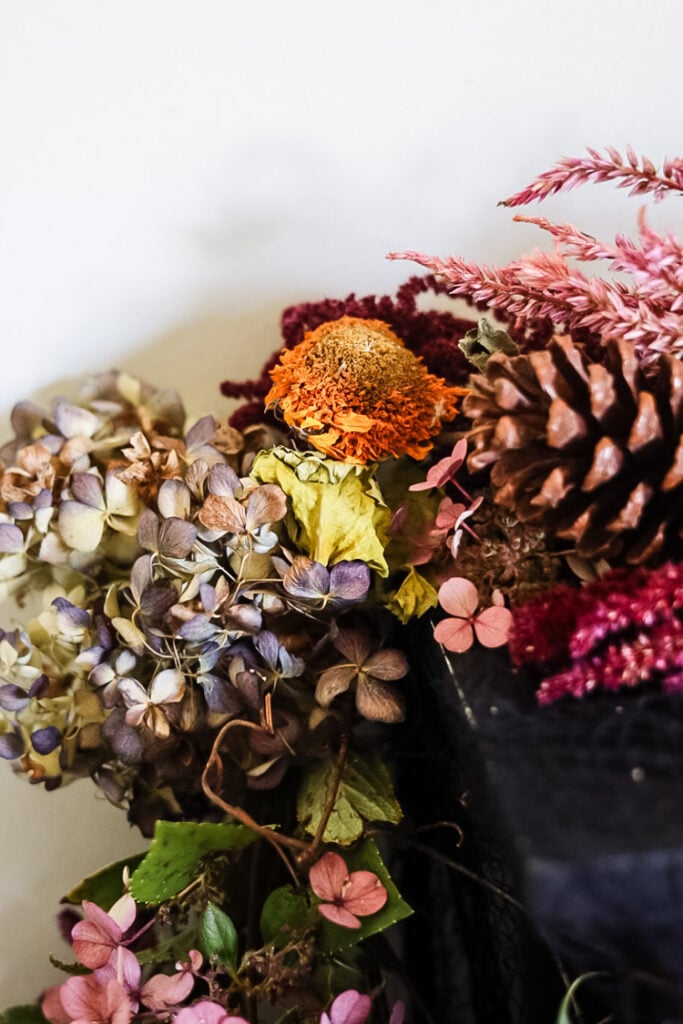
Then added the flowers, starting with hydrangeas for volume. I added different types of hydrangeas: dried ‘Endless Summer’ hydrangeas in a palette of blues and soft greens, and then ‘Little Quick Fire’ panicle hydrangea flower heads that were a soft burgundy. I used floral wire to keep them in place along the grapevines.

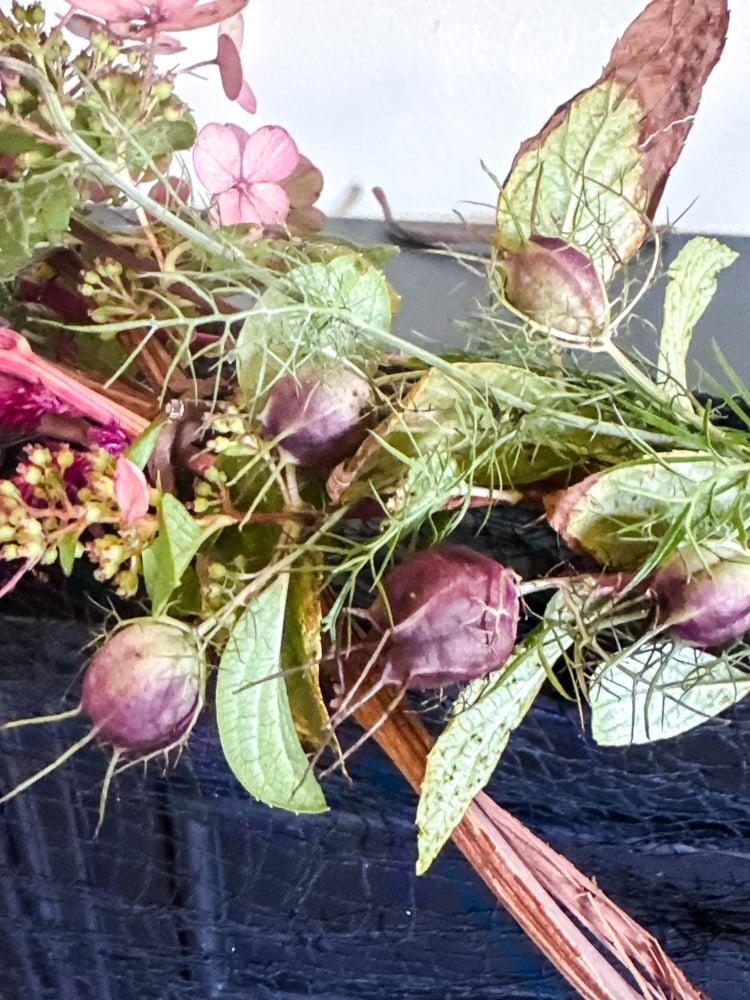
I finished filling in the Fall garland with amaranth for cascading color, sunflowers for cheerful pops, and nigella pods and celosia for texture.
Final Foraged Touches: To finish, I tucked pinecones throughout the garland for a rustic, autumnal feel.
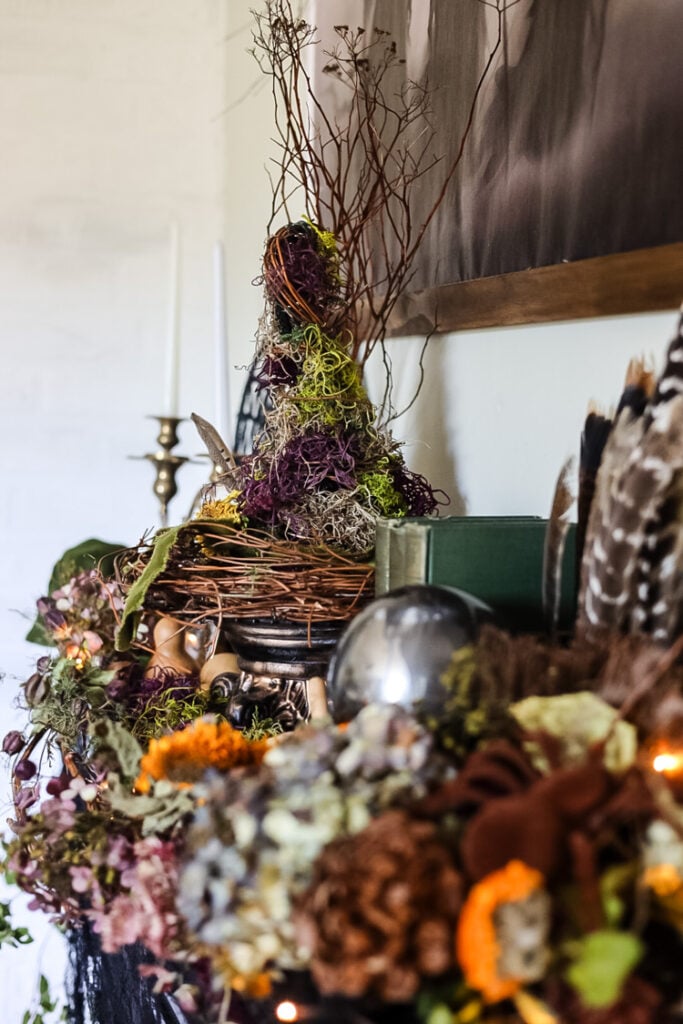
DIY #2: The Grapevine & Moss Witch Hat
This DIY proves that even the simplest (and sparkliest!) craft store find can be transformed into something truly enchanting. With a little natural texture and foraged charm, this witch hat became a magical centerpiece for my mantel.
Materials for Witch Hat
- Tinsel Witch Hat
- Grapevine Garland
- Mixed Moss
- Spanish Moss
- Hot glue gun & glue sticks
- Green velvet ribbon (It’s the best deal! I stock up when on sale)
- Embellishments: small dried sunflower, amaranth stems, a feather
Pro Tip: Why You Need a Bag of Moss in Your Craft Stash
If you don’t already keep moss on hand, now’s the time to start! A bag of mixed moss (like Spanish moss and sheet moss) is one of the most versatile and affordable supplies you can own. Here’s why:
Covers a multitude of sins: Hide floral foam, ugly pots, or unfinished edges in seconds.
Adds instant texture and depth: Perfect for giving plain surfaces a natural, organic feel.
Great for seasonal decor: Use it for fall, spring, Christmas- you name it!
Lightweight and easy to glue: Works beautifully with hot glue, tacky glue, or even wire.
I’ve used mine in wreaths, topiaries, fairy gardens, and even as filler in vintage pots. It’s a small investment with endless creative returns!

How I Made It:
Remove the Tinsel:
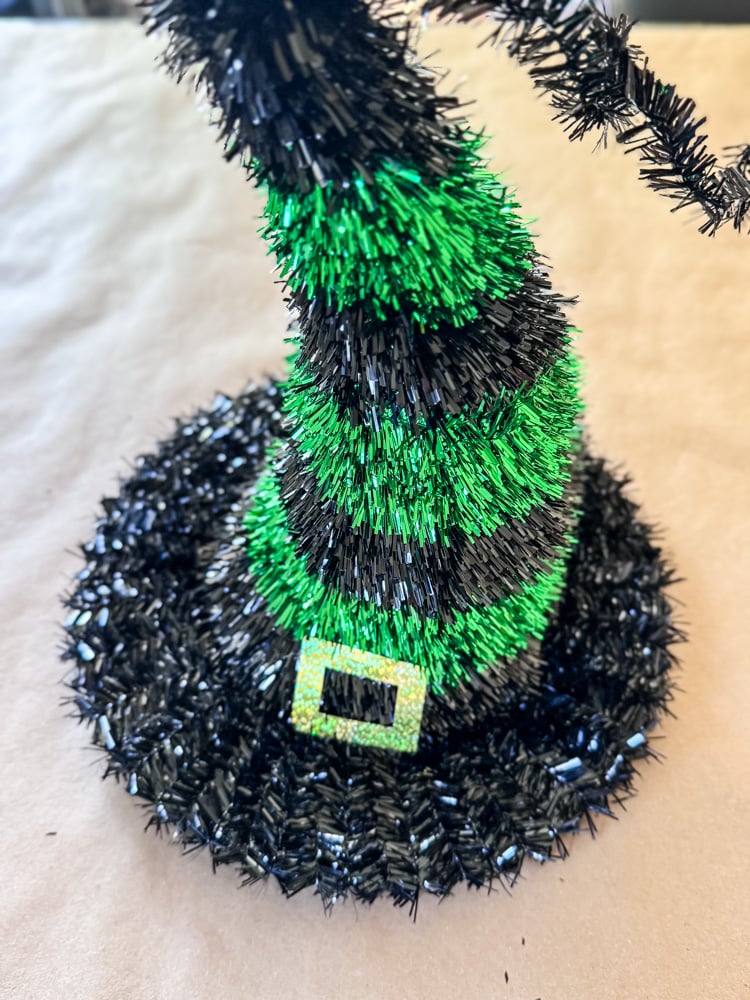
This is the easiest (and most satisfying!) step. The tinsel is all one piece—simply find the end and unwind it from the plastic hat base.
Wrap with Grapevine:
Grapevine garland is held together with small pieces of floral wire. You will want to snip or unwrap the wire to loosen the garland before starting this step.
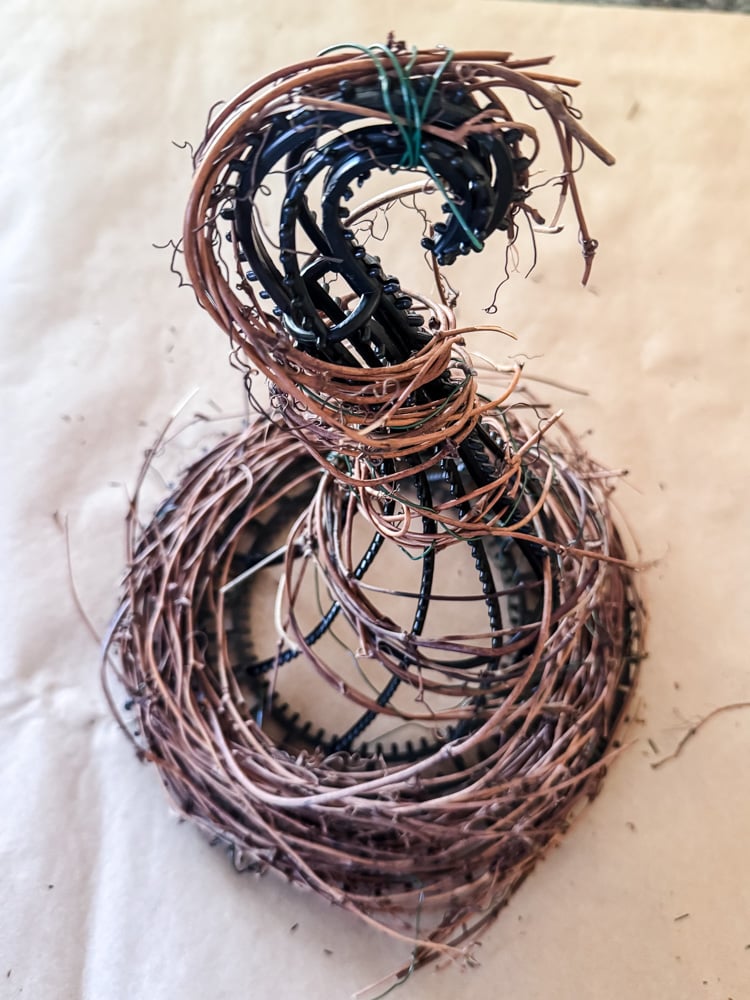
Starting at the tip, wrap the grapevine garland around the hat in a diagonal pattern, working your way down toward the brim. Secure the grapevine with floral wire.
Focus the wraps around the base of the hat and the area where the cone meets the brim, as this is where you’ll want the most coverage. Don’t worry about covering every bit of plastic; the peek-through areas will be filled with moss.
Prefer a more rustic texture? Completely cover the hat with grapevine garland. This alternative method emphasizes the natural weave of the vines for a cohesive, organic look.
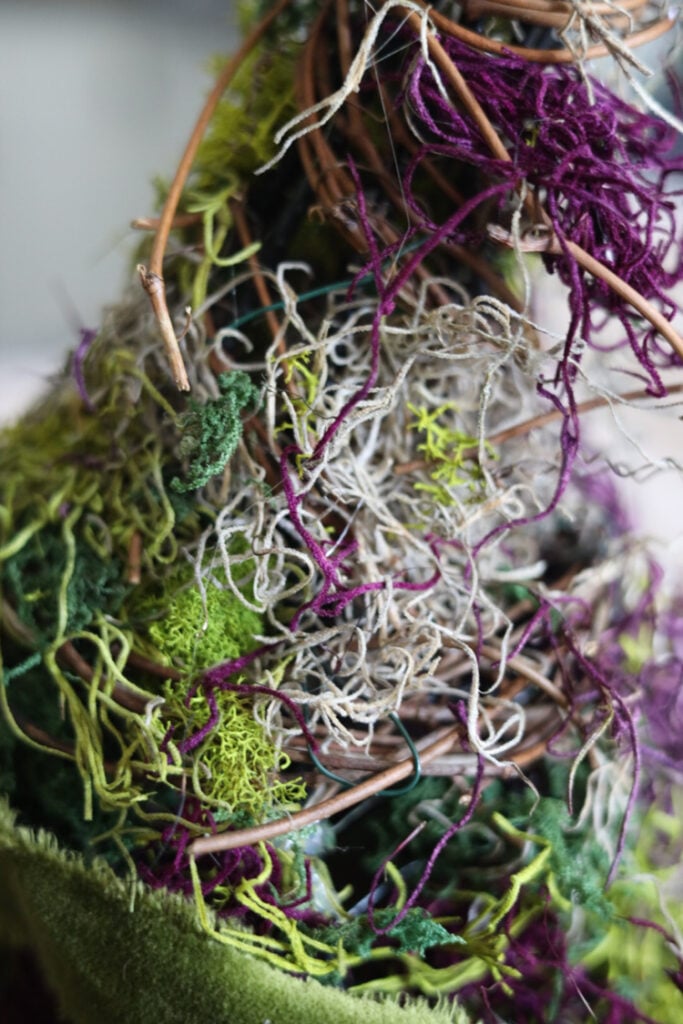
Add Mossy Texture:
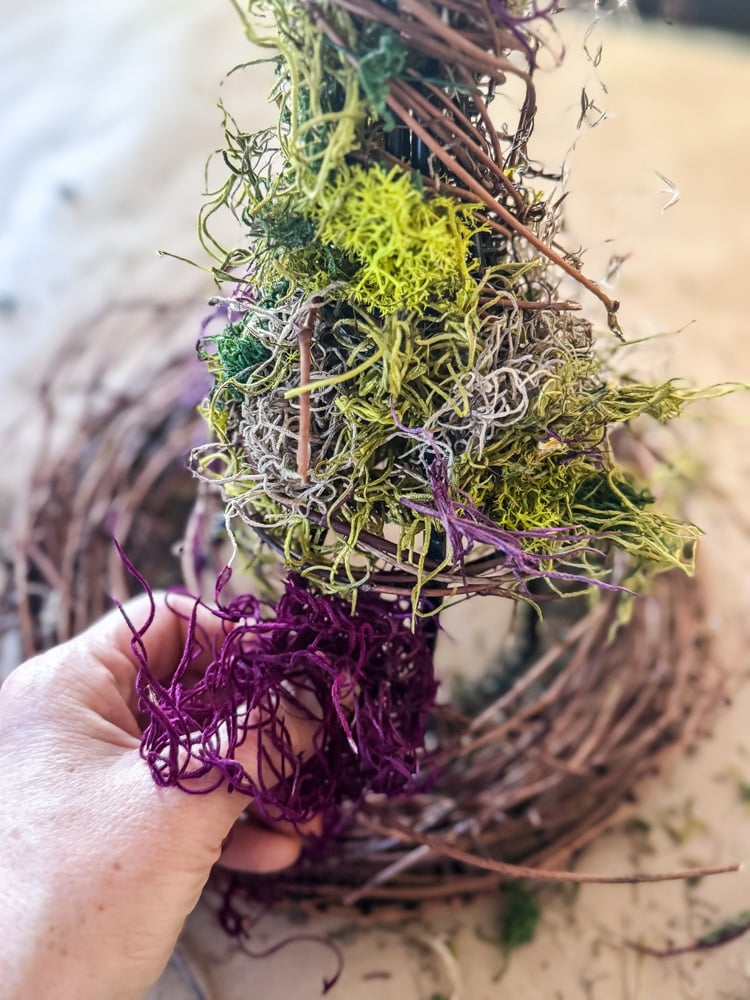
Using your hot glue gun, attach clumps of mixed moss to fill in the gaps between the grapevine. I used a variety of textures and colors for depth: vibrant green moss, whimsical purple Spanish moss, and other natural shades from the bag. Press the moss firmly into the hot glue, using a craft stick, silicone finger protectors, or tweezers to avoid burning your fingers.
Embellish with Ribbon & Botanicals:
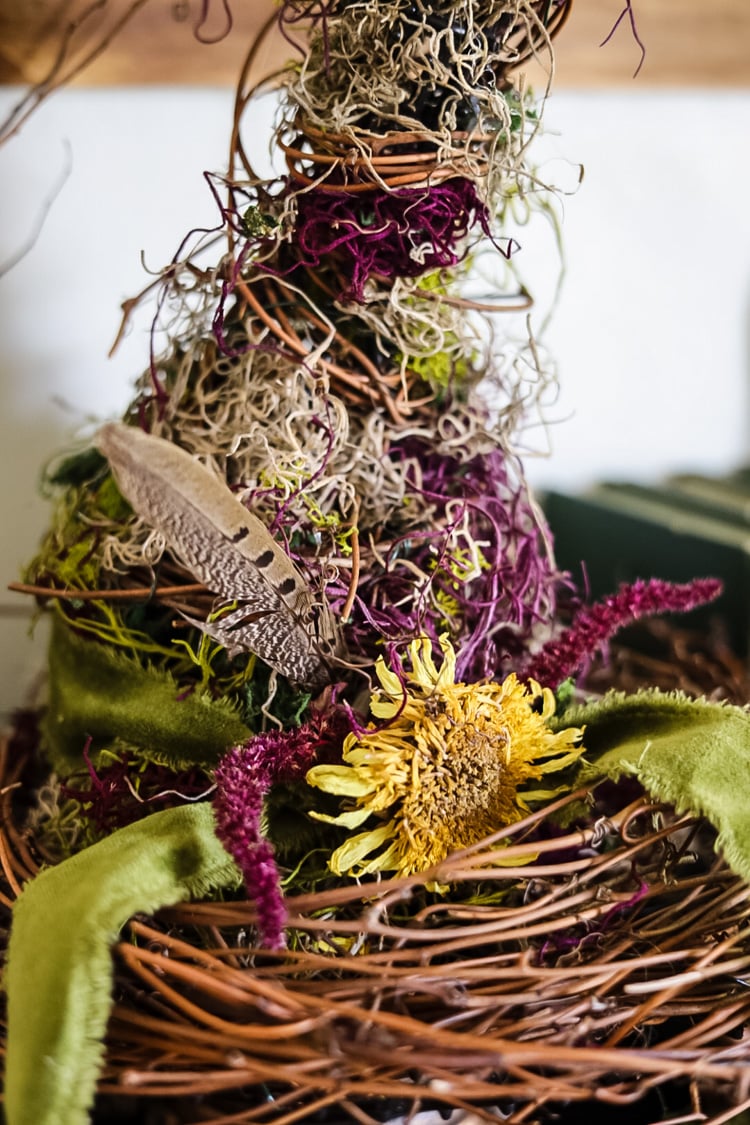
For a touch of elegant whimsy, I tied a green velvet ribbon around the base of the cone. Then, I gently tucked in a small dried sunflower, a few stems of amaranth, and a feather. This gives it that “fresh-picked from a mystical garden” look!
Looking for another witch-y cute diy idea? Check out these witch hat topiaries!
Pro Tip: PSA: Hobby Lobby is my go-to for affordable luxe velvet ribbon! You can find beautifully frayed styles in multiple colors and widths, often for under $3. It’s the perfect finishing touch!
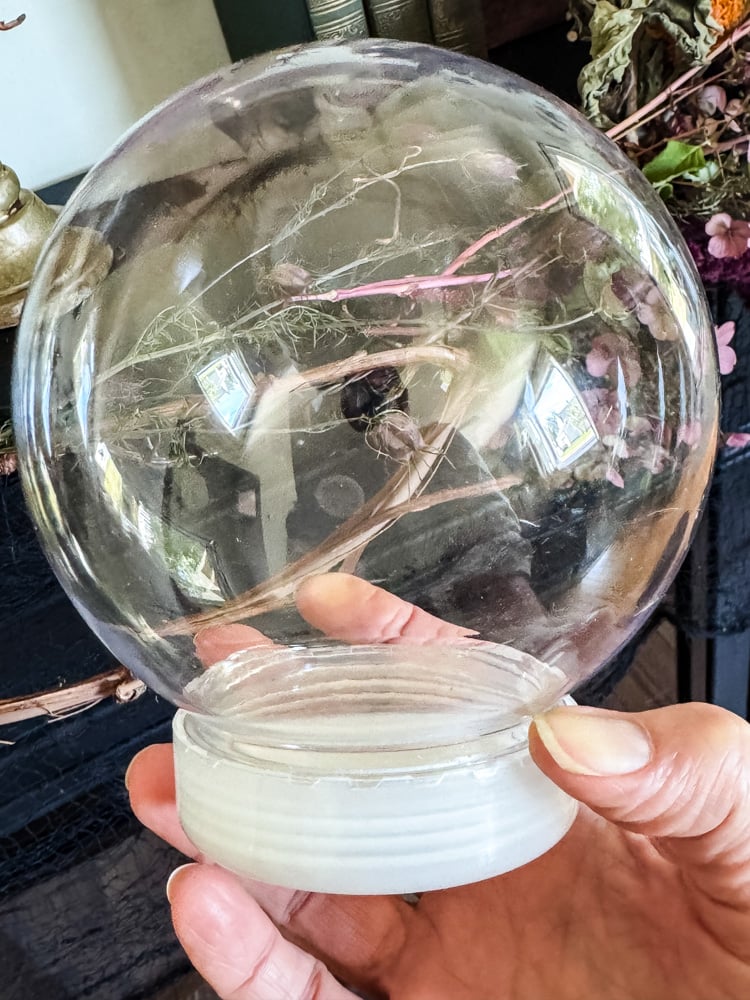
DIY #3: The “Magic” Crystal Ball
No witchy mantel is complete without a crystal ball, but the store-bought versions often look more like plastic party favors than mystical artifacts. My solution? A quick and easy DIY using a simple plastic craft globe and a can of looking glass paint! This transformative spray paint creates a gorgeous, mirror-like, translucent finish that looks like real glass , perfect for seeing into the future (or at least pretending to!).
Materials for this Project
- Plastic Craft Globe
- Looking Glass Spray Paint
- Black Spray Paint or Craft Paint
Here’s What To Do:
- Prepare Your Work Area: Spray painting is messy! Do this project outside or in a very well-ventilated garage. Lay down newspaper or cardboard to protect your surface.
- Spray the Globe: Shake the can of looking glass paint. Holding the can right into the opening at the bottom of the globe, spray the paint INSIDE, rotating it to cover all sides. You will probably have to do this 2-3 times to get it everywhere. Don’t worry if it still looks translucent, the mirror effect develops as the paint dries!
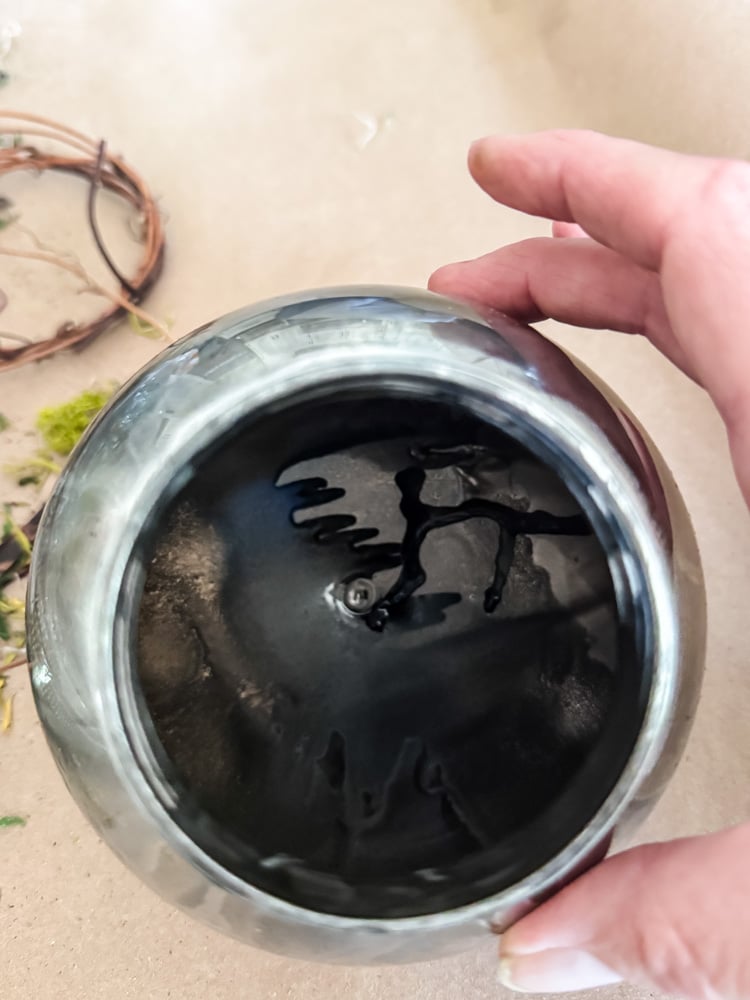
- Follow with Black Matte Spray Paint (a squirt of black craft paint will work too!). Spraying and rotating the paint inside, you are NOT trying to cover all of the surface if the globe.

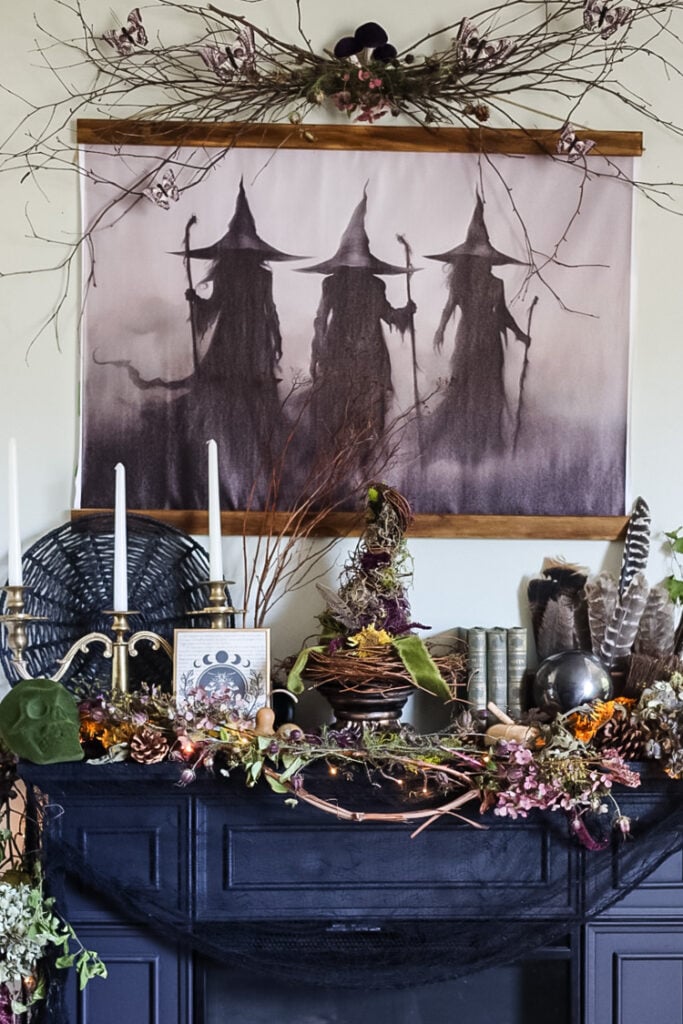
DIY #4: The Wooden Witch Art & Hanger
I found this wonderfully vintage-style witch canvas print on Amazon, but it needed a little something extra to feel truly rustic and special. When I saw the price of large poster hangers- nearly $30 for one! I knew there had to be a better way. So, I created my own custom hanger for just a few dollars using simple craft wood and stain. It adds so much character and perfectly complements the mantel’s handmade vibe.
Materials for this Project
- Canvas print (Mine is 36″ wide, from Amazon)
- Two pieces of craft wood (1/2″x2″x36″)
- Wood stain (I used a dark walnut)
- Hot glue gun & glue sticks
- Staple gun
- Jute twine for hanging
Here’s What To Do:
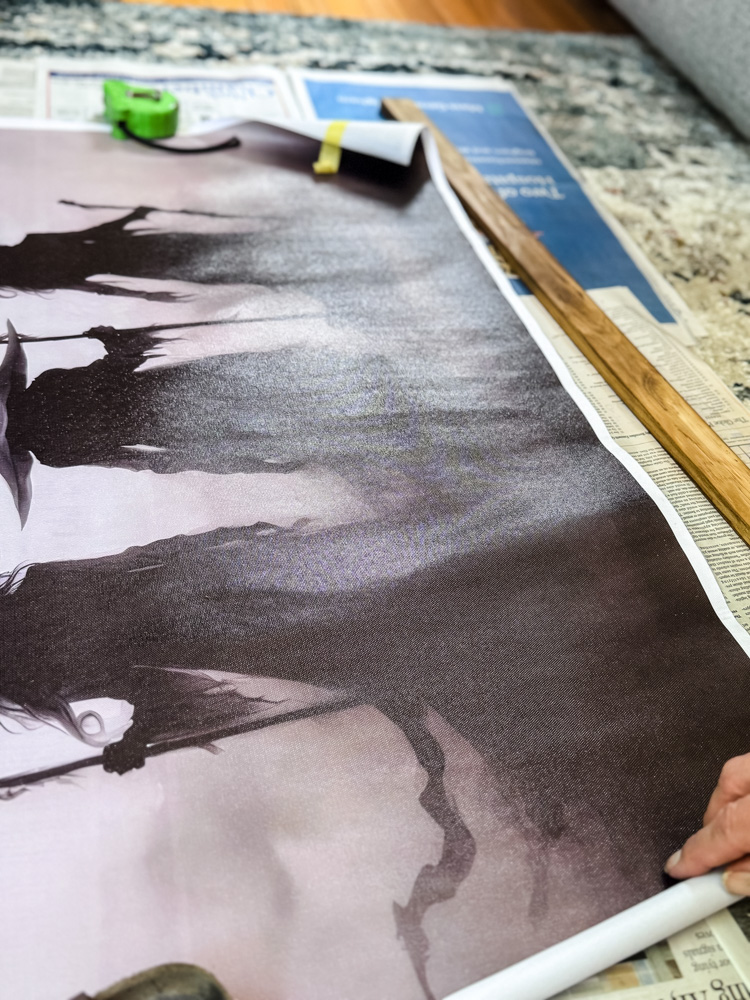
I bought 2 pieces of craft wood at Lowe’s, but you could have a furring strip cut to size, or slightly longer, for this project. Then, I applied a coat of dark wood stain ( I don’t like staining, but this Varathane Less Mess is like using shoe polish, super easy!) to each piece and let them dry completely. This gives them an instant rustic, aged look.
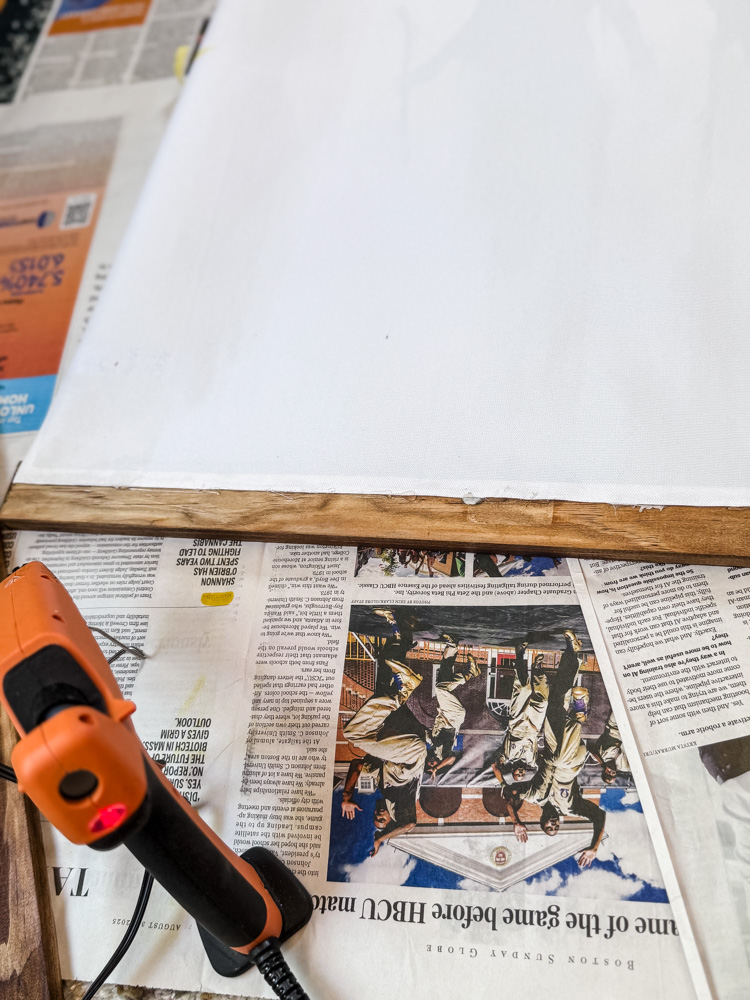
Attach the Top Wood Piece:
Lay your wood on a clean, flat surface. Working quickly in small sections, apply beads of hot glue to the wood and immediately press the canvas backing onto it. The glue dries very fast, so do a few inches at a time until the entire top edge is secure.
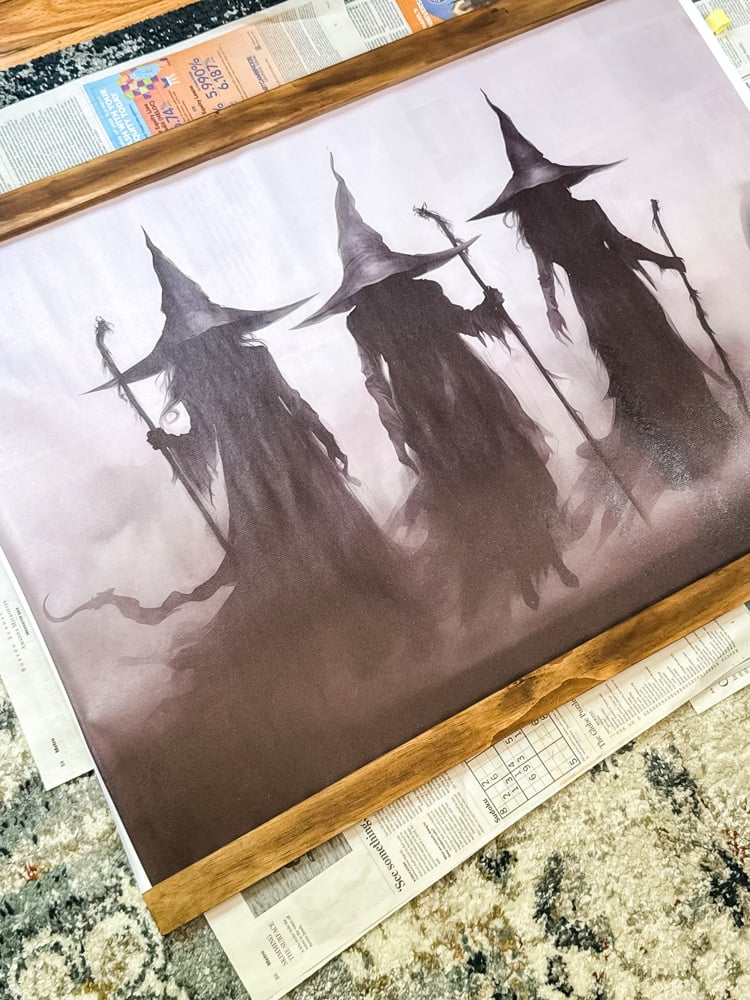
Repeat the process for the bottom wood piece, ensuring the canvas is taut and straight as you glue.
Add Hanging Twine: Cut a length of jute twine long enough to hang your art with a little slack. Using a staple gun, securely staple the ends of the twine to the back of the top wood piece.
Styling the Mantel: Bringing the Magic Together
Now for the most rewarding part: pulling all your handmade elements together to create a display that feels cohesive, balanced, and truly enchanting. The key to a beautifully styled mantel is layering, varying heights, and creating a sense of effortless magic. Here’s how I brought it all together:
Gathering the Extras: Shopping Your Home
Before I started styling, I did what I always do first: I “shopped my own house” for pieces that would enhance the witchy, natural, and vintage vibe I was after. This is the secret to creating a layered, personal look without spending a dime! I gathered:
- Vintage pieces like a brass candelabra, brass frame, and old green books (you might recognize these from past projects!).
- Natural elements like wild turkey feathers from my backyard and dried flower heads arranged in a small vase for extra height and texture.
- Thrifted finds like a wooden sugar mold
- Textural Item: a black wall basket that was once part of my basket wall.
- A few Dollar Tree gems like a green skull and a flocked spider for a subtle, playful touch of Halloween.
Mixing these cherished items with our handmade DIYs is what makes the mantel tell a story. Now, let’s bring it all together!
Start with the Focal Point
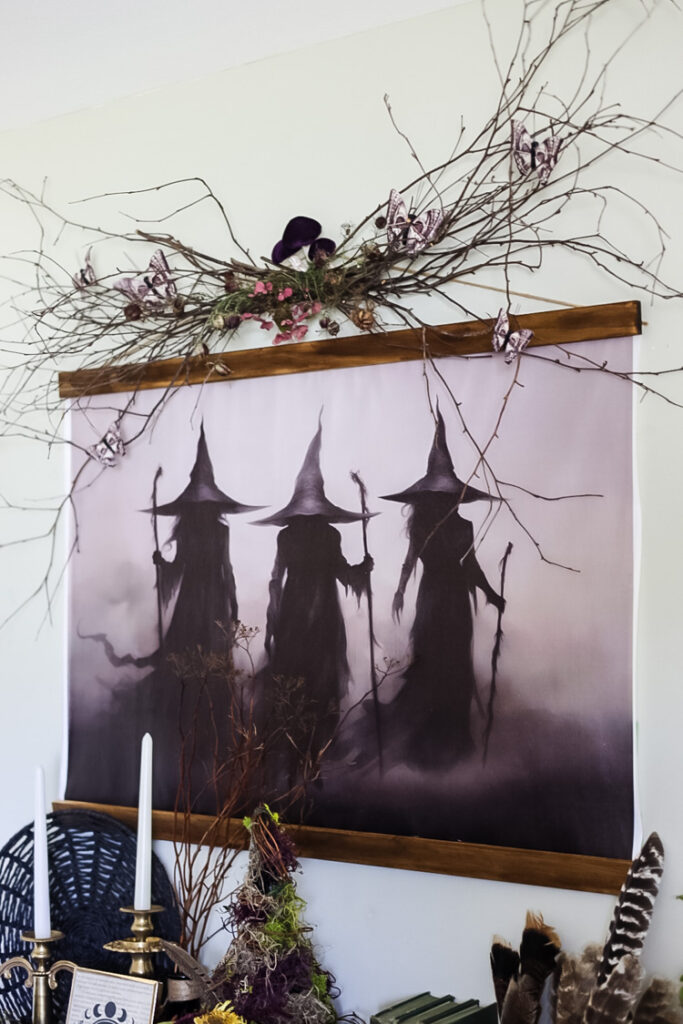
After hanging the art, I created a natural birch twig swag to frame it. I foraged the birch branches and embellished them with dried nigella pods and delicate butterflies (they are from Michael’s Halloween, but I can’t find them online), & clip-on purple velvet mushrooms. I used a monkey hook to hang it above the canvas, letting it arc gracefully above the witch art.
The natural branches and butterflies draw the eye upward, making the entire display feel larger and more immersive, while the art itself grounds the theme.
Mossy Witch Centerpiece
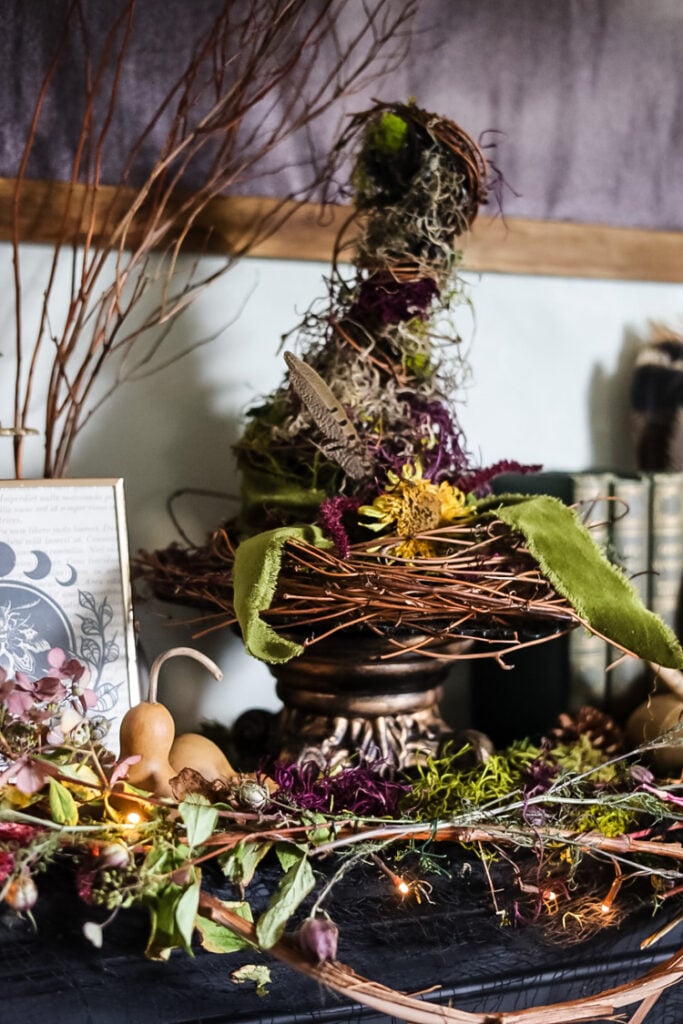
Elevate the Witch Hat: In the center of the mantel, I added the mossy witch hat, but to give it presence and height, I placed it atop a thrifted candle pillar base. This elevates it literally and figuratively, making it a commanding yet graceful focal point.
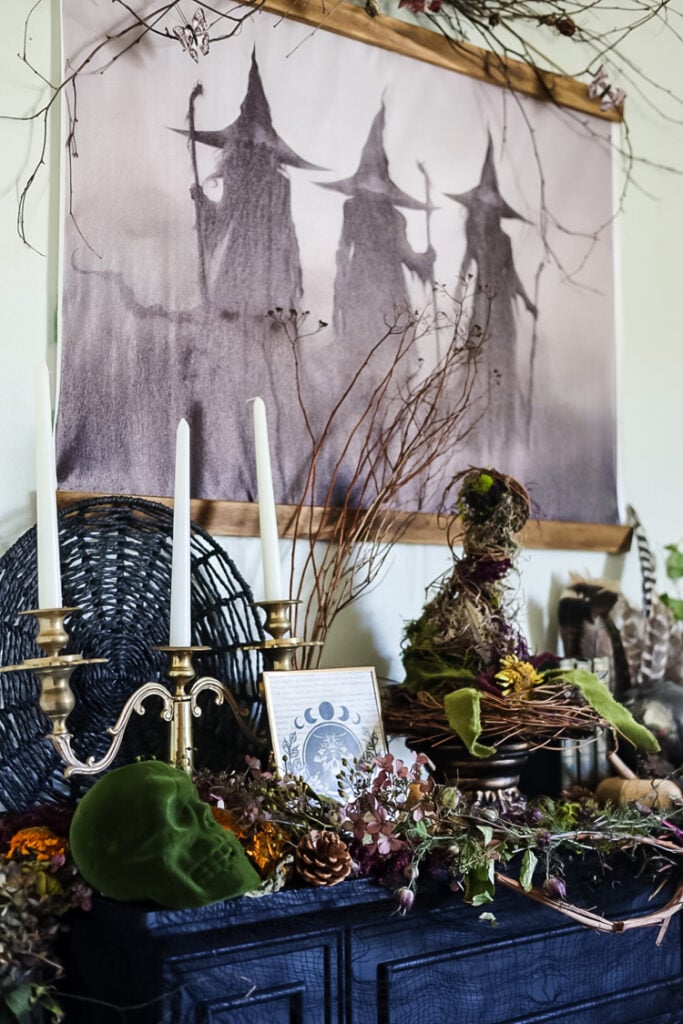
Framed Witchy Art
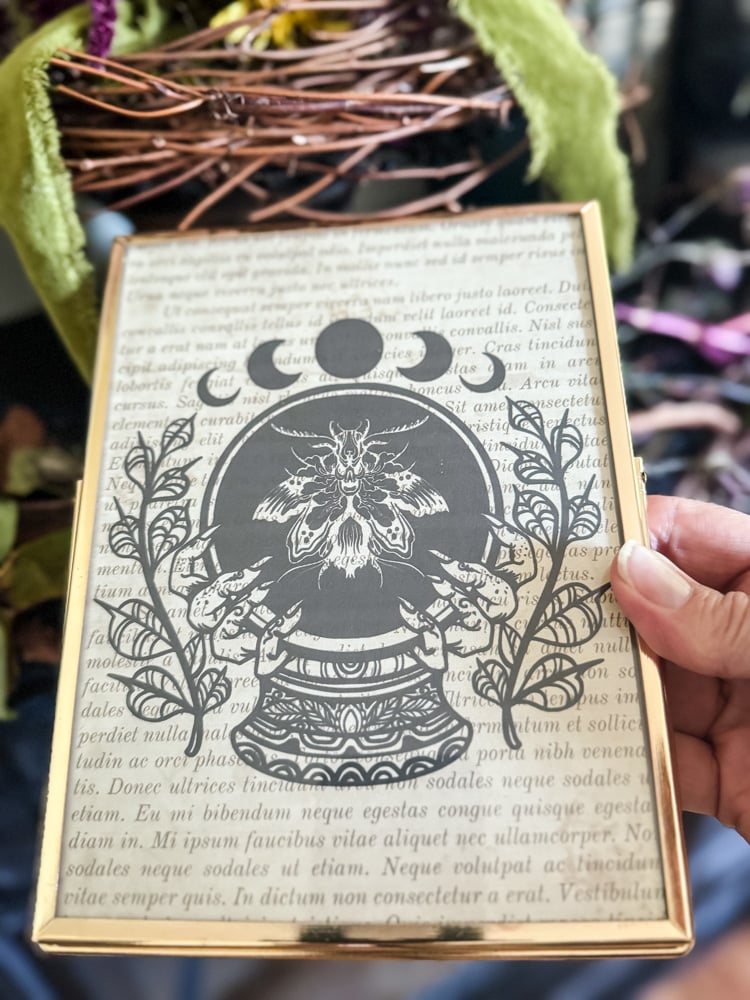
To make your mantel magic even easier, I designed a whimsical, vintage-inspired witchy illustration that you can download and print for free!
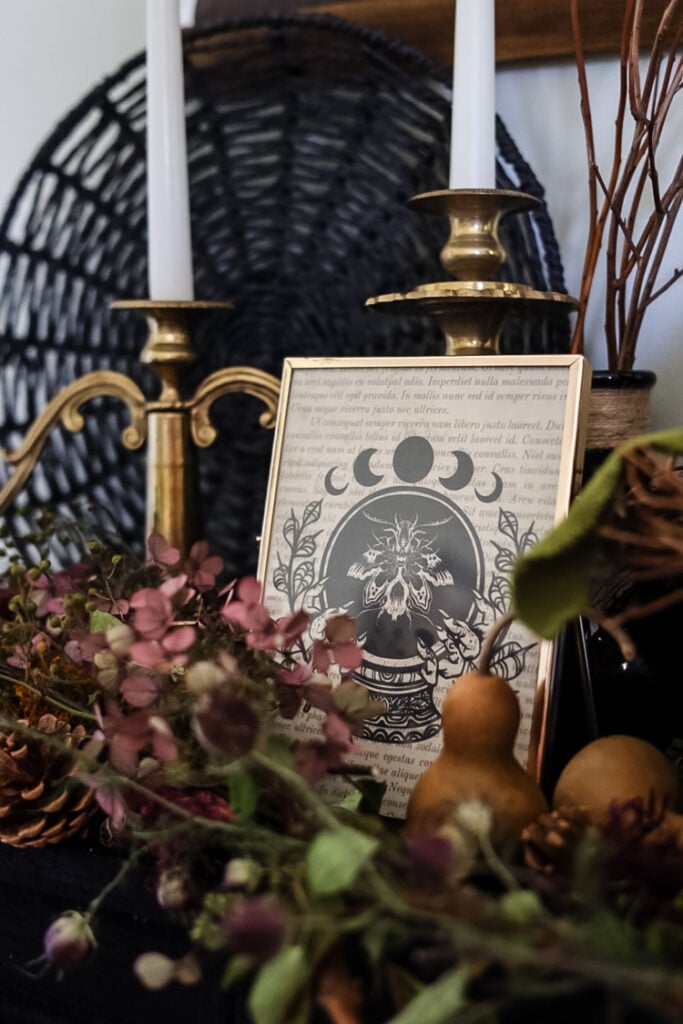
I printed mine and framed it in a brass “floating” frame to let the art take center stage. It adds a perfect touch of elegance and mystery.
Vintage Candelabra
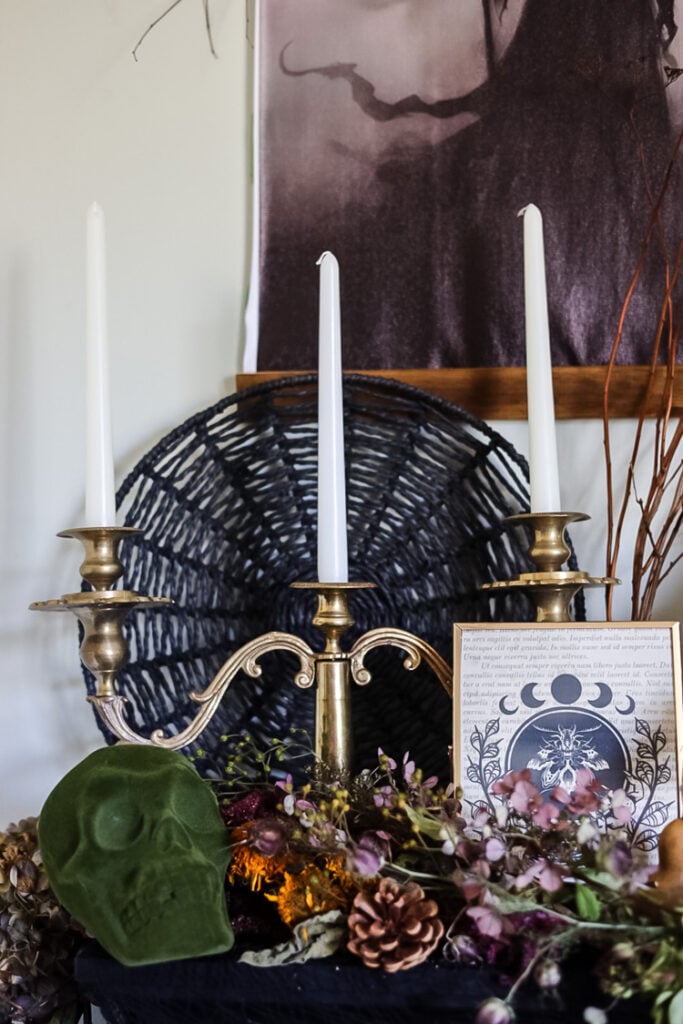
To the left side of the mantel, next to the framed witch art print, I added a vintage brass candelabra for a touch of old-world elegance. To give this corner even more height and textural interest, I rested a black round wall basket on the wall behind it. Finally, for a subtle and playful nod to the season, I tucked a flocked green Dollar Tree skull in front of the candelabra. This little cluster creates a captivating vignette that feels curated and full of discovery.
Continue The Magic
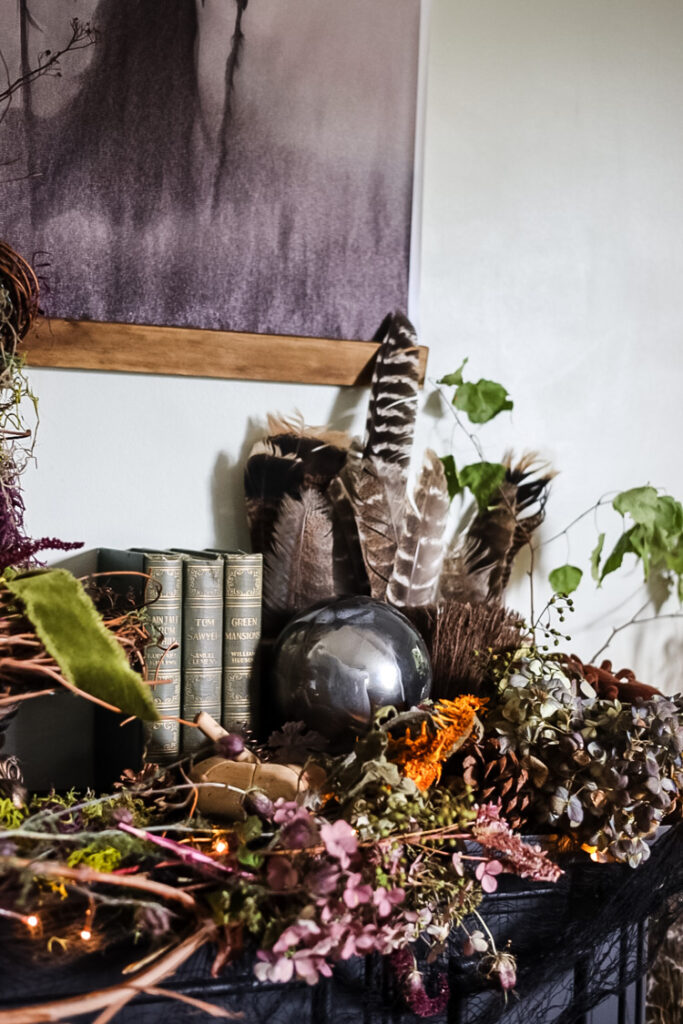
On the right side of the mantel, I created balance by adding a vintage wooden sugar mold filled with wild turkey feathers foraged from the backyard. Right next to it, I stacked a few of my beloved green vintage books to tie in that rich, earthy color palette. In front of this arrangement, I placed the DIY “magic” crystal ball, letting it anchor the scene with its mystical, reflective presence.
Incorporate Additional Texture
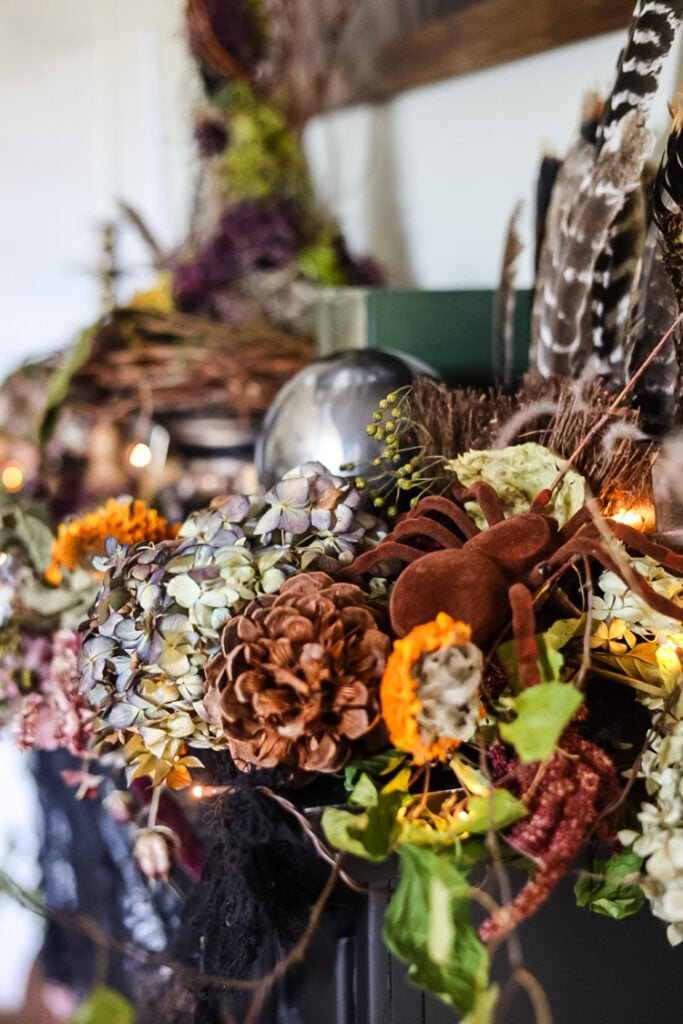
To fill in any gaps and add even more rustic charm, I tucked in a few extra dried florals and clumps of moss pulled from my stash. For a touch of witchy whimsy, I added mini brooms and mini dried gourds throughout the arrangement. These tiny, natural elements make the entire display feel curated, layered, and wonderfully authentic.
Light the Magic!
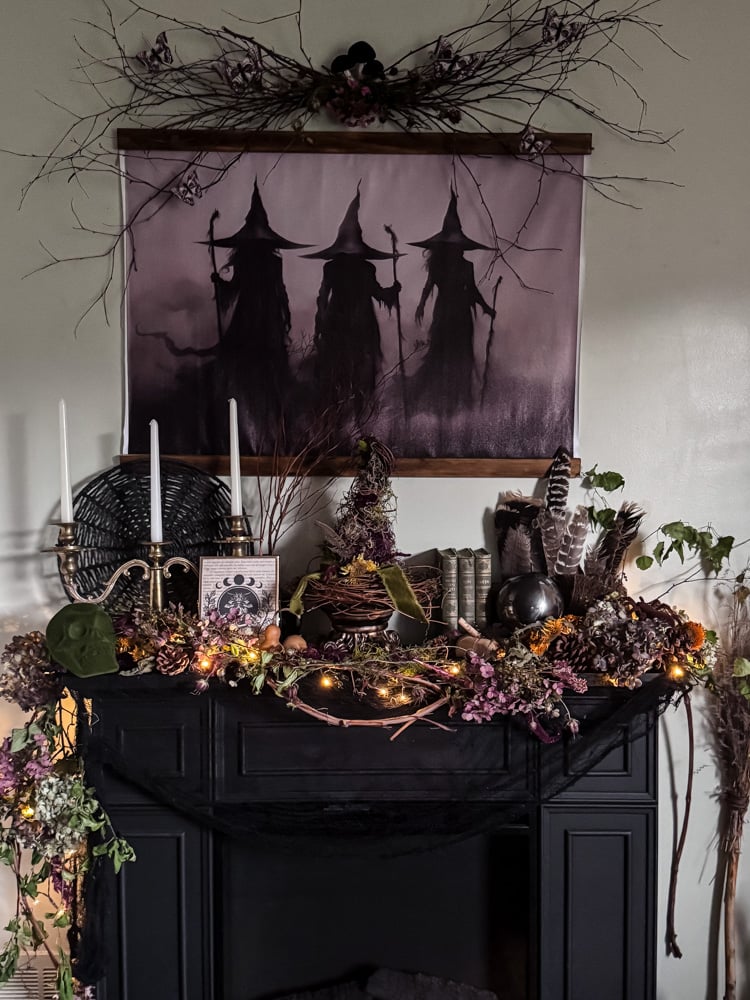
Finally, as the sun went down, I turned on the battery-operated LED lights woven into the garland. This is when the true magic happens! The soft glow highlights the textures of the moss, the petals of the dried flowers, and the reflective surface of the crystal ball, creating a cozy, mystical ambiance.
Pro Tip: Don’t be afraid to play around! Step back often, take a photo with your phone (it helps you see the balance differently), and move things until it feels just right. The goal is for it to feel curated, not perfect.
And There You Have It! Your Own Pretty Witch Mantel!
To me, home isn’t about having the perfect look; it’s about having a space that tells your story. Whether it’s a DIY you’re proud of, a vintage find you love, or even a little Dollar Tree treasure, it’s those intentional touches that make a season, or a room, feel truly yours..
Thank you so much for following along with this whimsical journey. If you bring a little of this pretty witch magic into your own home, I’d be over the moon to see it!
See your projects featured! If you are inspired by this or any of my other DIY projects, I would love to see them and add you to the Reader’s Spotlight gallery. Send a photo to me at jennifer@cottageonbunkerhill.com
xo, Jennifer
Shop the Look


Fall Inspiration
decorating + DIY ideas:
Fine Art Printables
29 Free Downloads
exclusively for email subscribers


I love this look, and how creative to re-create that witches hat with grapevine and dried flowers!
Thanks so much!!
Your mantel with all the dried elements turned out stunning. I love how you created a Halloween inspired mantel and kept it sophisticated. Love everything except the spider. LOL You know me with spiders and snakes.
LOL!! This is the only kind of spider I’m OK with!
OMG LOVE!!!! Super creative and oh so witchy, Jennifer!! The looking glass is such a perfect accent!
I bought that globe maybe 4 years ago? Maybe 5? for an Xmas project I never did!!