
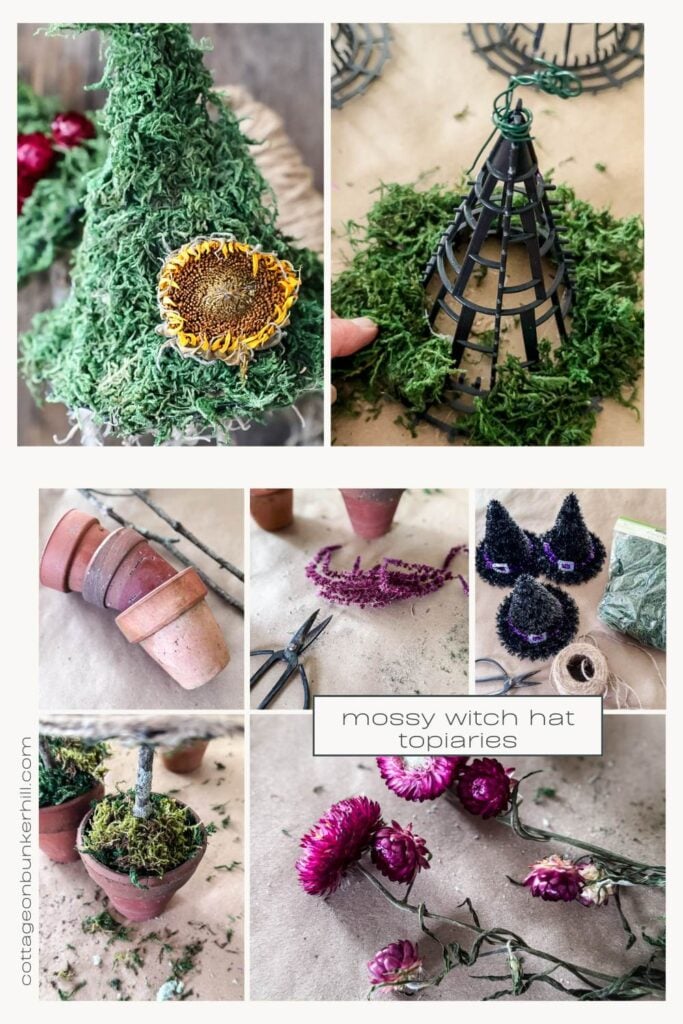
You know those Dollar Tree finds that are just a little too gaudy to leave as-is, but have so much potential hiding underneath? That’s exactly how I felt when I spotted these sparkly tinsel witch hats! I knew with a little moss, a little glue, and a lot of imagination, they could become something truly special. Say hello to the most charming, rustic witch hat topiaries. The perfect touch of whimsy for your Fall mantel or porch!
How I Turned Dollar Tree Hats into My Favorite Fall Decor
I’m always looking for ways to create beautiful Fall decor on a budget, and my latest project might just be my favorite yet! It all started with a few sparkly witch hats from the Dollar Tree. By swapping tinsel for moss and twine, and adding a simple branch “stem,” I turned them into adorable miniature topiaries that are full of rustic charm. They’re easy, affordable, and utterly customizable!
What You Will Need
I love a project that starts with a Dollar Tree run and ends with a walk in the yard! The supplies for these topiaries are a mix of new finds and foraged treasures, making them feel personal and unique. Let’s take a look at what you’ll need.
Materials for this Project
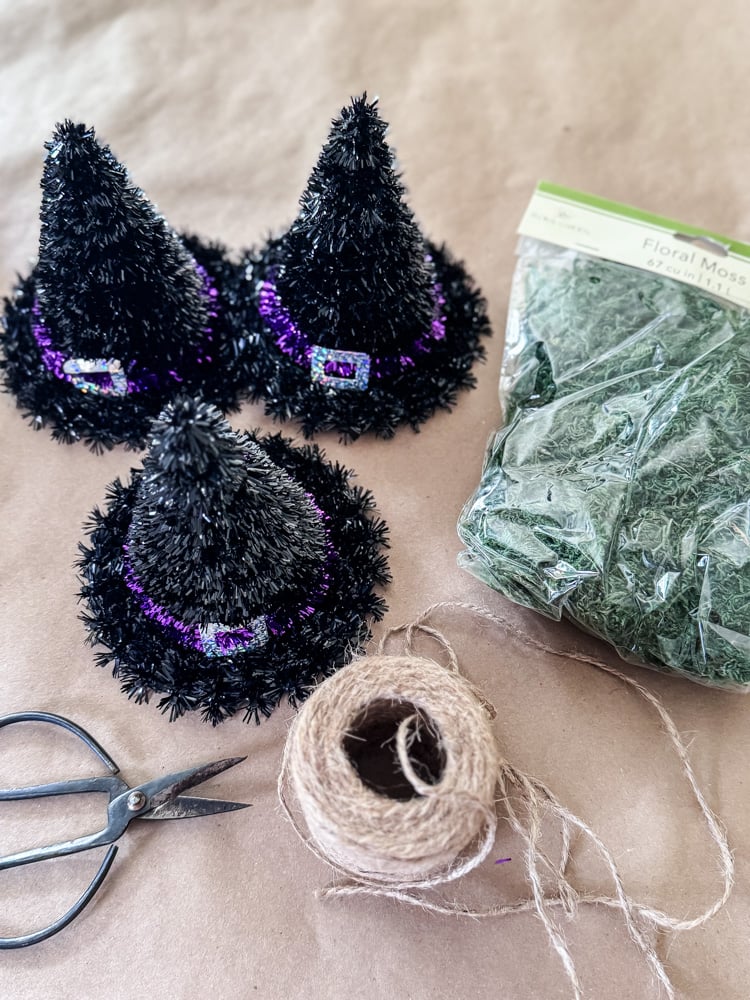
- Tinsel Witch Hats (Dollar Tree)
- Green Moss (Dollar Tree)
- Jute Twine
- Hot Glue Gun
- Heavy Gauge Floral Wire (optional)
- Dried Flower Embellishment (optional)
- Small Terracotta Pots
- Stick
- Floral Foam
- Spanish Moss
This post may contain affiliate links, which means we receive a small commission if you purchase through our links. See our disclaimer page for more information.
Witch Topiary: Step-by-Step Tutorial
Now for the fun part! Transforming those sparkly hats into something truly enchanting. I’ll walk you through each step, from de-tinseling to decorating, so you can create your own rustic masterpiece.
A Quick Note Before You Start:
Before you begin, I highly recommend covering your work surface with kraft paper or newspaper. This is one of my all-time best crafting habits! I bought a big roll of kraft paper two years ago, and it’s been a game-changer.
Whenever I start a messy project, I just unroll a section over my counter. When I’m finished, I simply gather up the paper with all the moss bits, glue strings, and mess inside and toss it straight into the trash. It makes cleanup an absolute breeze and protects your surfaces from hot glue and debris
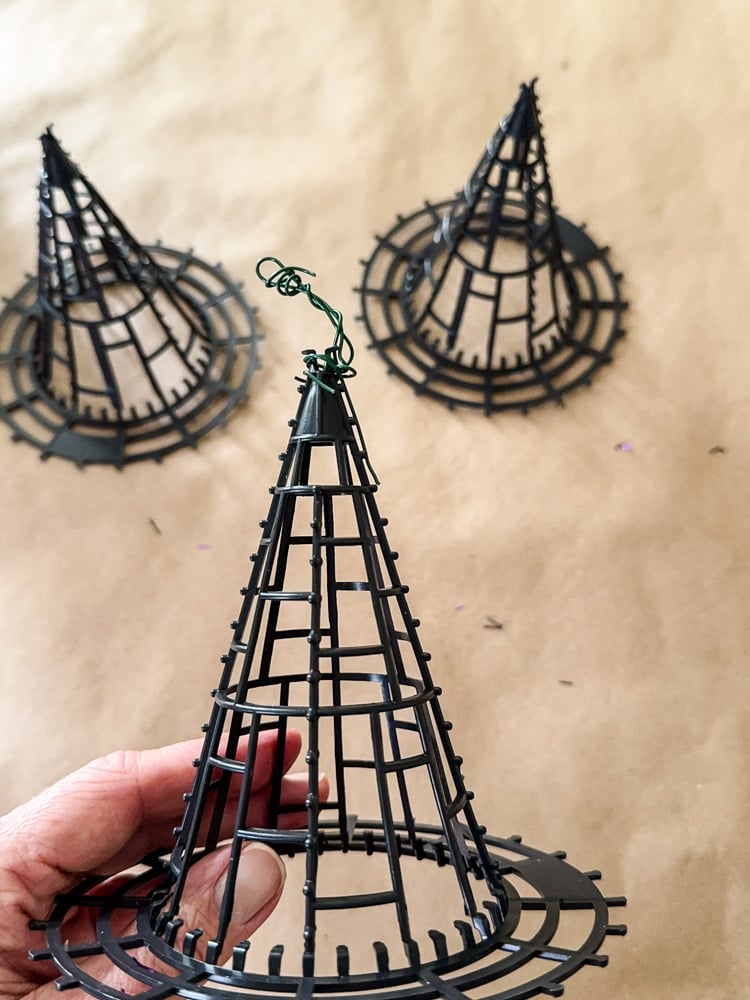
Step 1: Transform the Hat – Remove the Tinsel
The first step in our magical makeover is to reveal the simple plastic hat base hiding under all that glittery tinsel! This part is surprisingly satisfying.
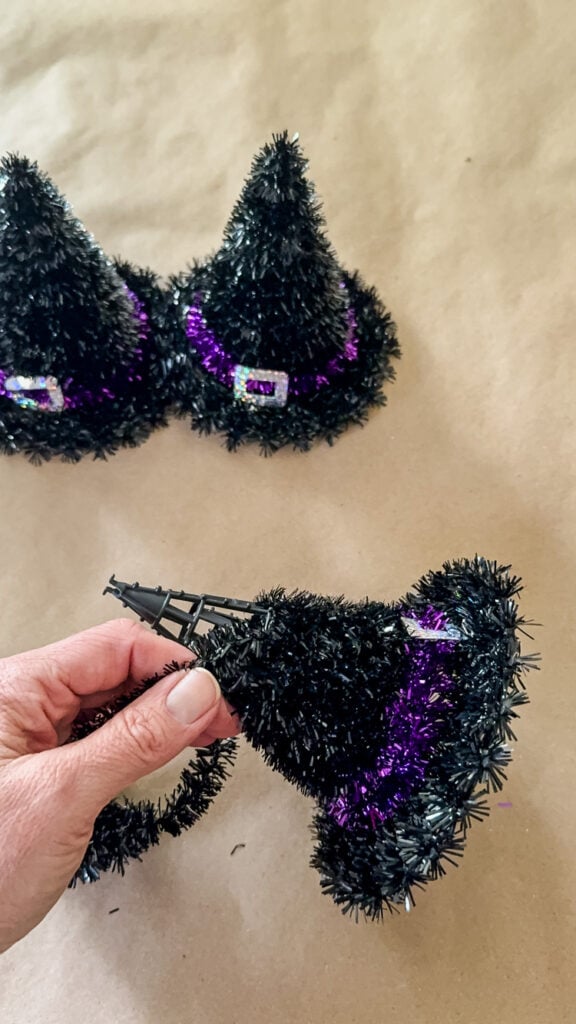
Starting at the very top of the hat (the point!), gently find the end of the tinsel strand. Once you have it, simply start unwinding it from the hat, much like you’d unwind ribbon from a spool.
The tinsel is usually just wrapped around and not glued down, so it should come off easily. If you encounter a stubborn spot, you can carefully use scissors to snip it free. You’ll be left with a plain, plastic witch hat form that’s the perfect blank canvas for our rustic project.
Step 2: Create a Crooked Tip (Optional)
This next step is totally optional, but it adds a wonderfully whimsical, “storybook” touch to your witch hat! To give the tip a charming crooked bend, I used a small piece of heavy-gauge floral wire.
- Cut a piece of wire about 4-5 inches long.
- Fold the wire in half to create a small, sturdy loop at the folded end.
- Gently wrap the two loose ends of the wire around the very tip of the plastic witch hat form, securing the loop firmly in place.
- Once attached, you can gently bend the wire loop to create a fun, crooked tip that looks like it’s straight out of a fairy tale!
- Feel free to add a little hot glue if you feel it’s unstable.
This tiny detail makes such a big difference, giving your topiary even more personality and a handcrafted feel
Step 3: Cover the Hat with Moss
Now for the fun part! Giving our witch hat its beautiful, textured moss covering! This step transforms the plastic base into something truly rustic and enchanting
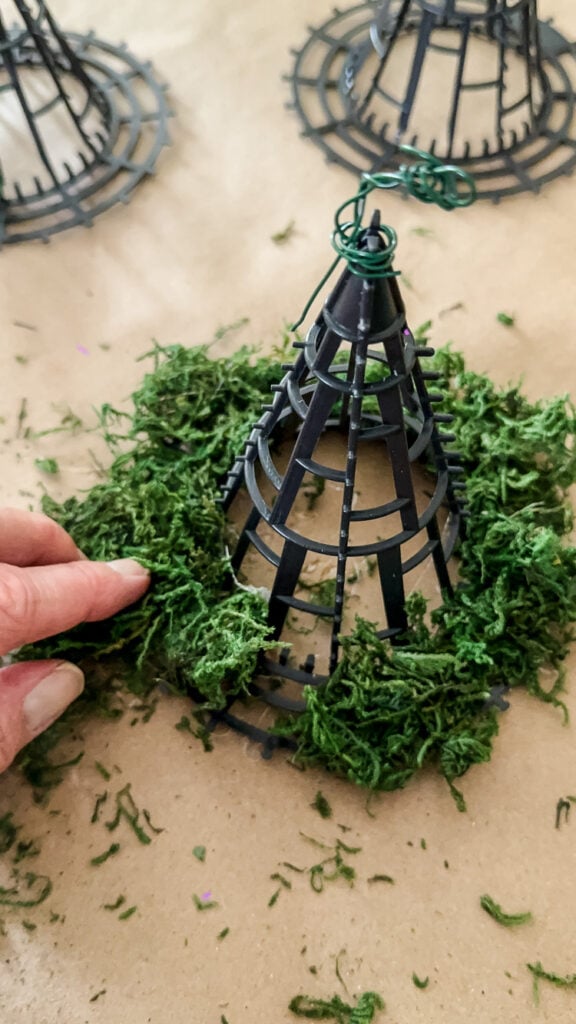
Working in small sections, apply hot glue directly to the plastic hat frame, starting at the base. Then, press a piece of preserved moss firmly onto the glued area
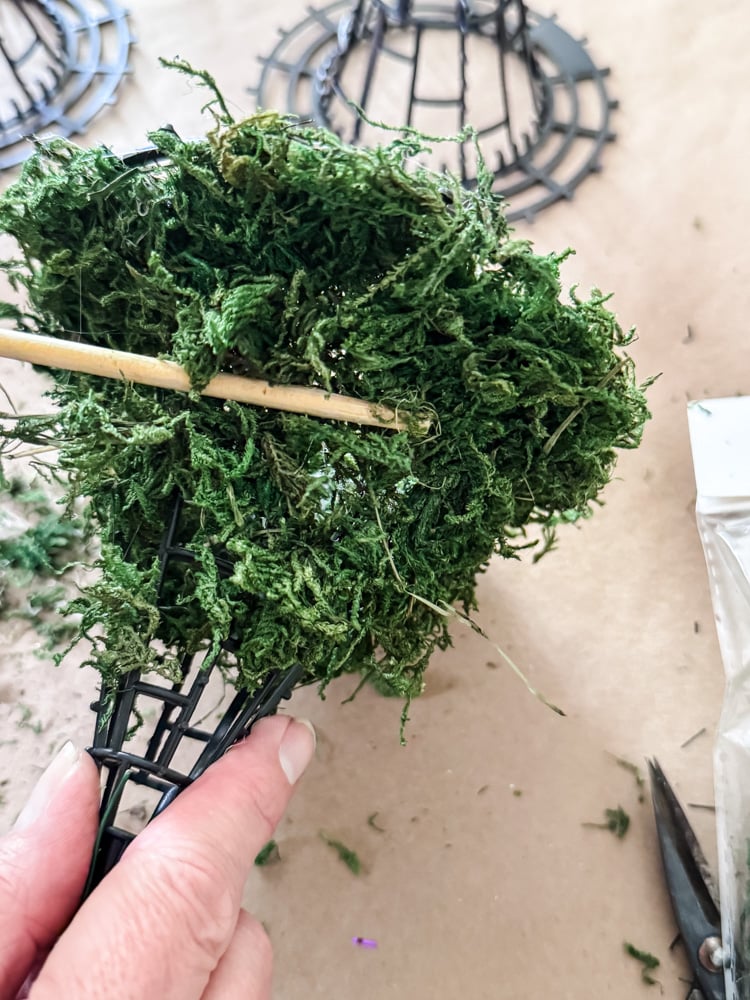
Safety First! Hot glue is extremely hot and can easily burn your fingers. I highly recommend using a silicone finger protector or, in a pinch, use the end of a wooden chopstick or the handle of a paintbrush to press the moss into place safely. This lets you apply pressure without risking a burn.
Continue gluing and layering the moss, working your way up the hat until the entire surface is covered. Overlap the pieces slightly for full, lush coverage without any plastic showing through.
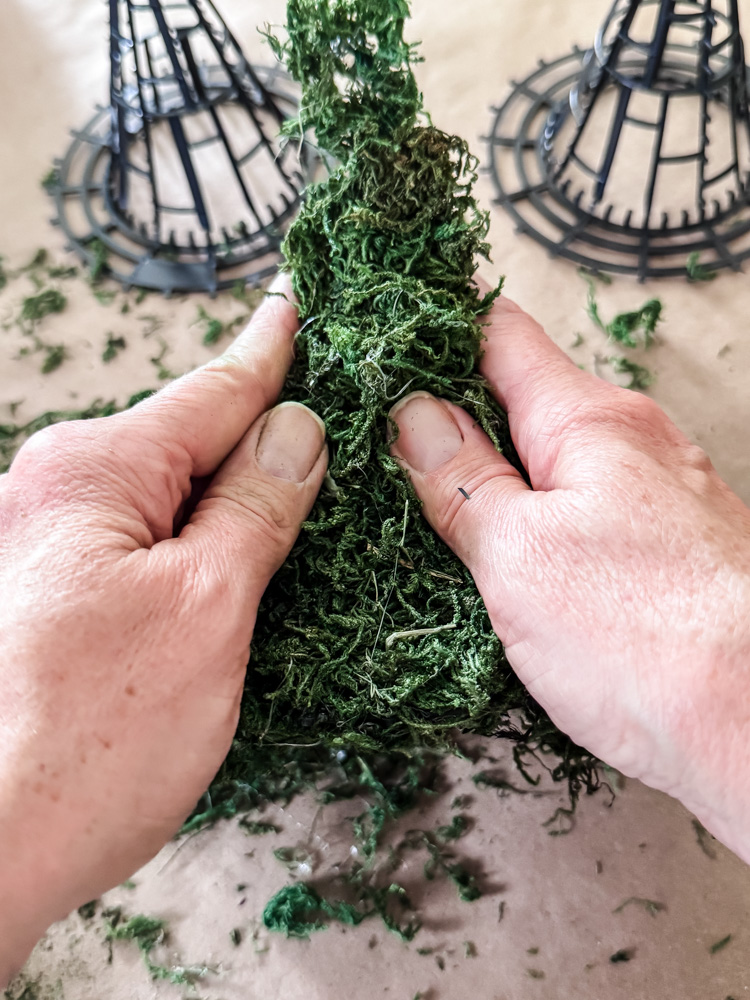
Once the hat is covered with moss and the glue is cooled, firmly press down on the moss to give the hat shape.
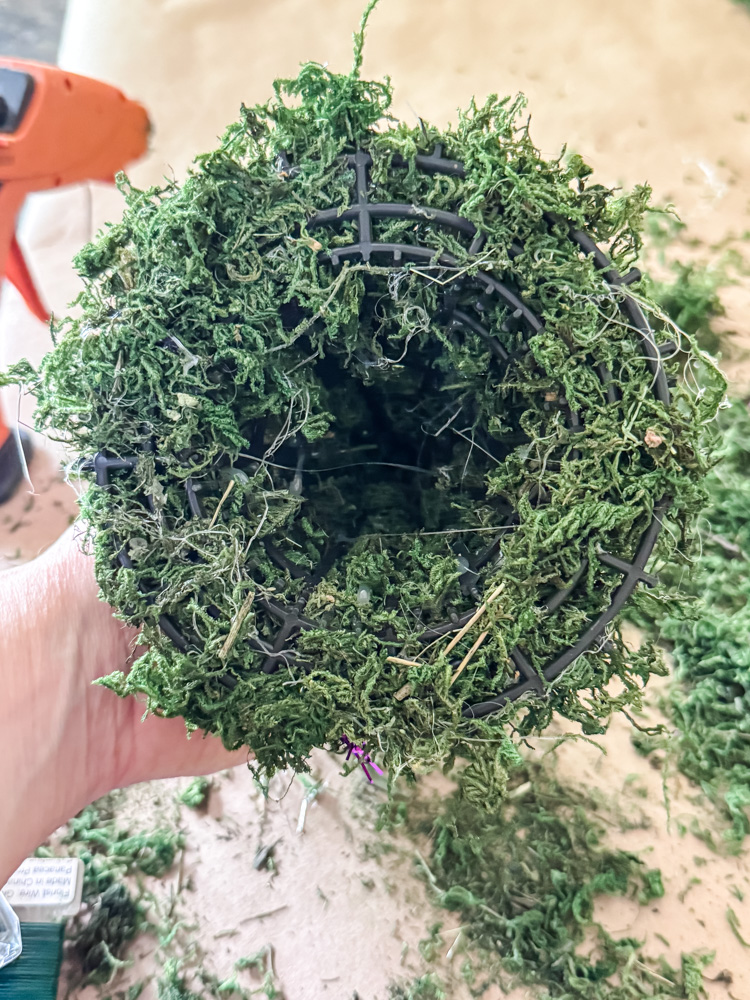
Pro Tip for a Finished Look: For a truly seamless and professional finish, don’t forget the underside of the brim!
After the top is covered, turn the hat over and drizzle hot glue along the underside. Then, gently press the glued area into the leftover “moss dust” and tiny fragments on your work surface. This will catch all those little particles and ensure no bright plastic peeks through from any angle, making your moss coverage look completely natural and intentional.
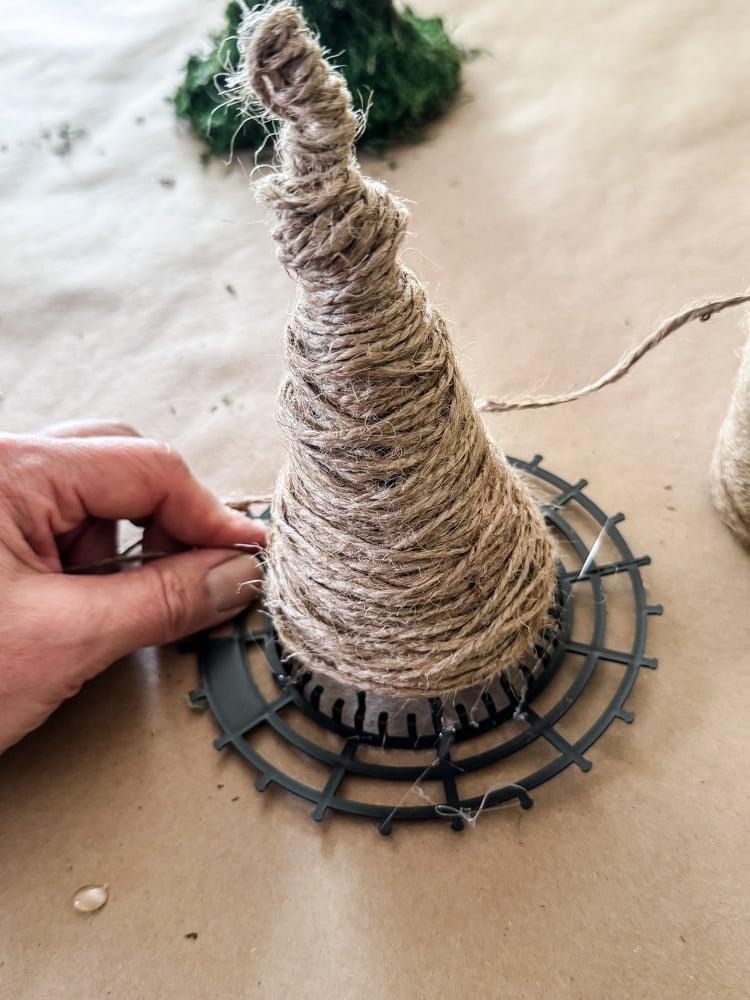
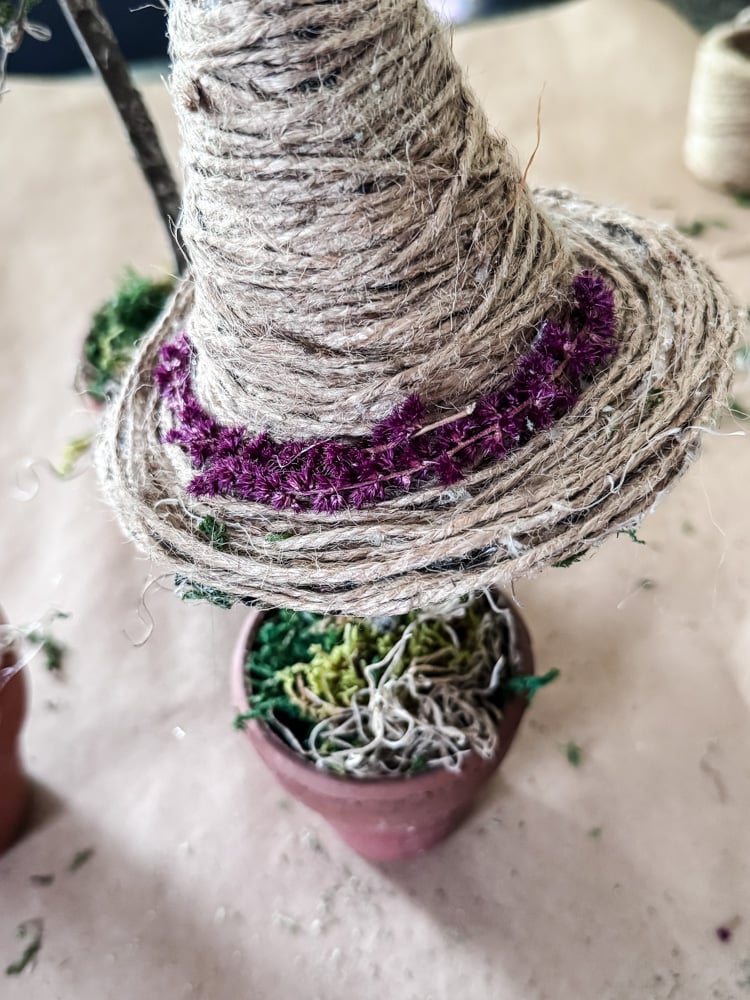
Step 4: Create the Jute-Wrapped Witch Hat
For a different texture and a cozy, rustic look, let’s wrap a hat with jute twine! This method is simple but requires a little patience but the result is so worth it.
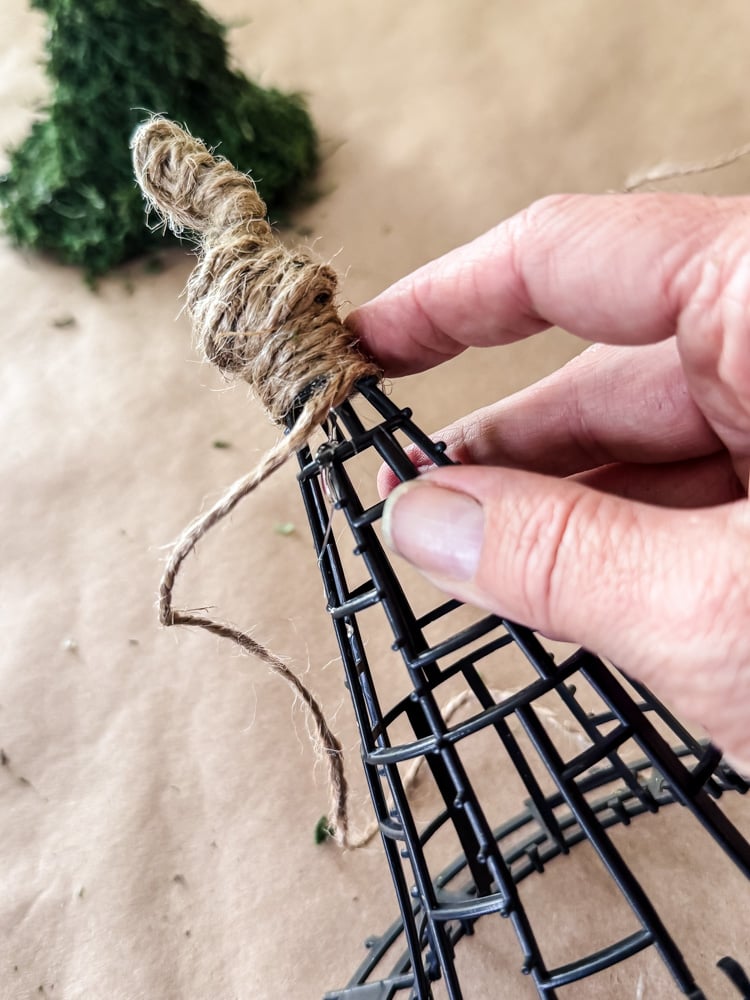
- Start at the Top: Begin at the very tip of the witch hat. Secure the end of your jute twine with a small dot of hot glue.
- Wrap Downward: Slowly and carefully wrap the jute around the hat, working your way down toward the brim. Keep the wraps snug and close together to cover the plastic completely.
- Embrace Imperfection: Don’t stress about every wrap being perfectly straight or spaced! A little variation adds to the rustic charm. If you notice a small gap, you can double back and add an extra wrap or two to cover it.
- Tack with Glue: For extra security, especially on curved areas, add a tiny, hidden dot of hot glue every few rounds to hold the jute in place. Be careful—a little goes a long way!
- Tackle the Brim: The brim is the trickiest part due to the curve. Take your time here. You may need to gently twist the jute as you wrap to help it lie flat. Secure it frequently with small glue dots on the underside where they won’t be seen.
- Finish and Secure: Once you reach the end, snip the twine and secure the final end with another small dot of glue on the underside of the brim. I also drizzled glue on the underside and tapped it over the ‘moss dust’ on the counter to cover the plastic.
And Just Like That…You Have a Decorations!
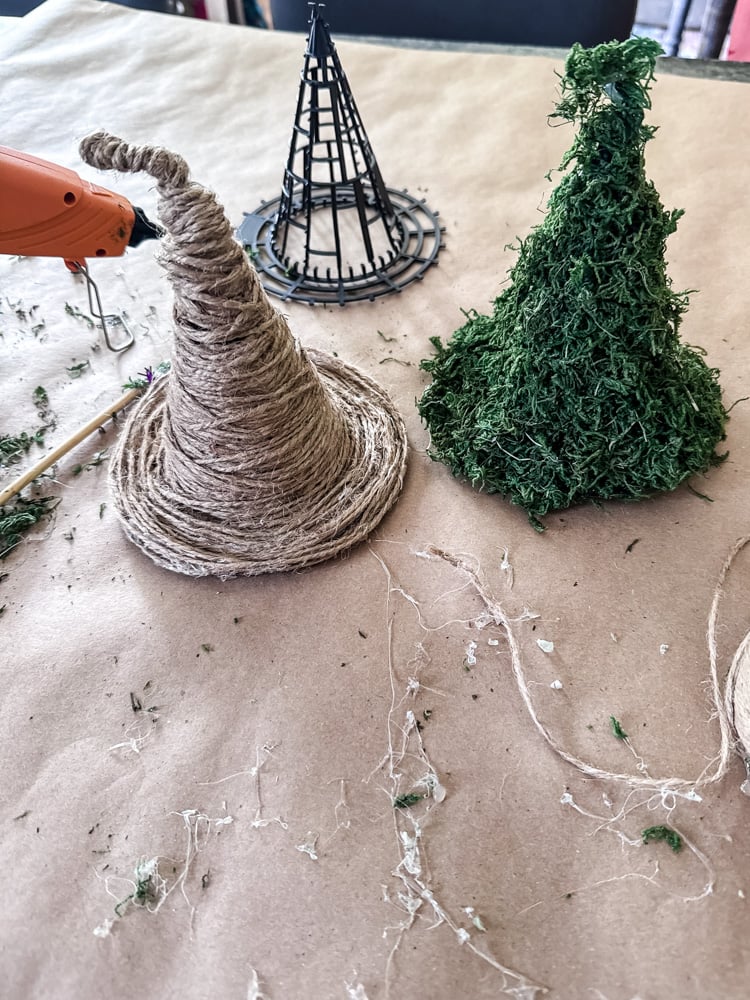
Look at that! You’ve already transformed a simple Dollar Tree find into something truly special. At this point, you could absolutely stop here and use your beautiful mossy or jute-wrapped witch hats as standalone decorations!
They’d look adorable:
- Tucked into a Fall wreath
- Lined up on a mantel alongside pumpkins and candles
- Scattered down a dining table as part of a centerpiece
But if you’re ready to turn them into even more of a statement piece, let’s keep going and create charming witch hat topiaries!
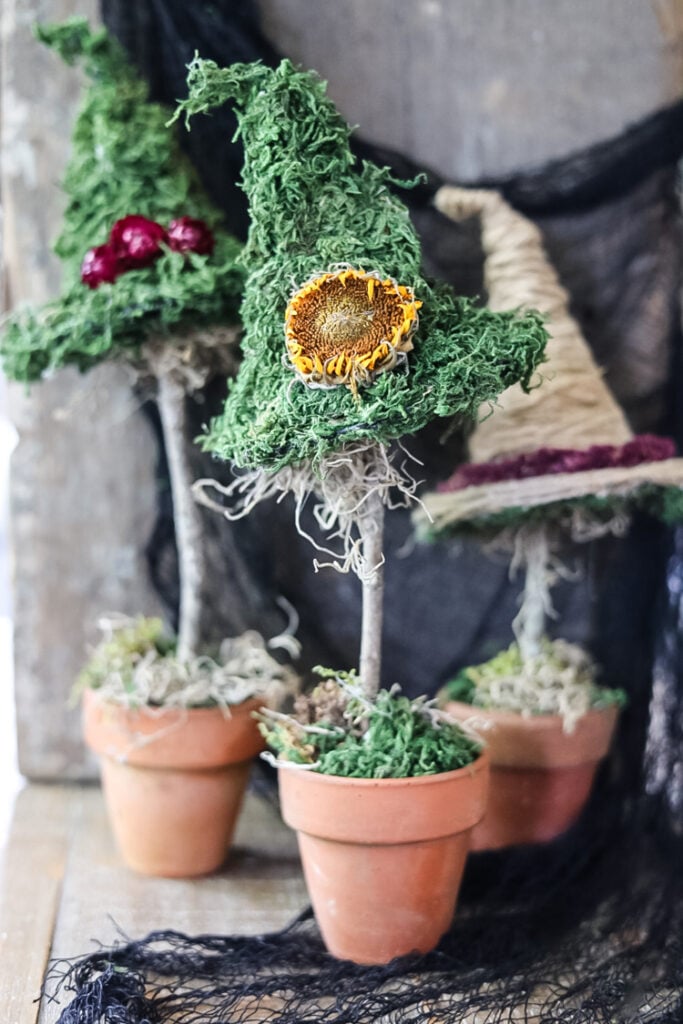
Step 5: Create the Topiary Base
Now let’s turn our beautiful witch hats into charming topiaries! For this, you’ll need small terracotta pots, a sturdy stick from your yard, and floral foam.
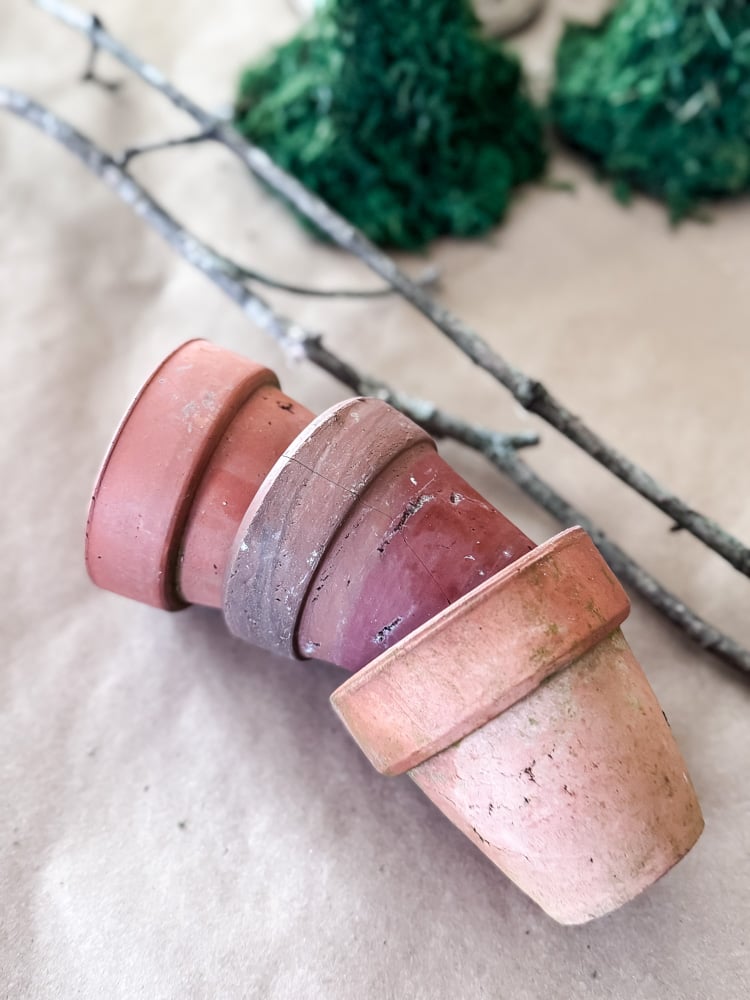
- Prepare the Pot: Cut a piece of floral foam to fit snugly inside your terracotta pot. For extra security, add a drop of hot glue to the bottom of the pot before pressing the foam into place. This will prevent it from shifting later.
- Prepare the “Stem”: Find a sturdy, interesting stick from outdoors. Cut it to your desired length-I chose roughly 12 inches for mine. For a dynamic look, I cut each of my three branches at slightly different heights to create a staggered effect when displayed together.
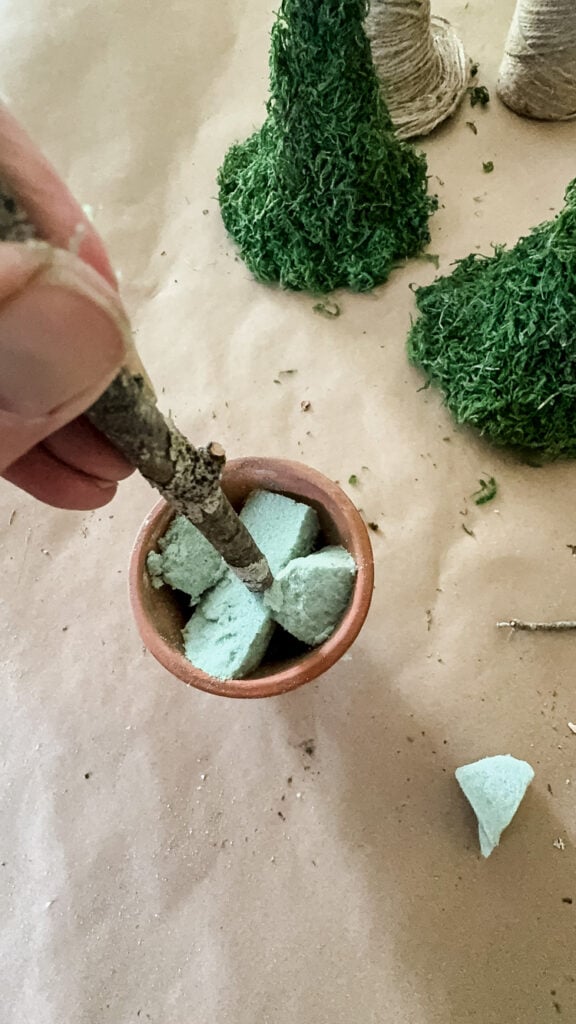
- Assemble the Base: Press the bottom end of your stick firmly down into the center of the floral foam in the pot.
- Attach the Hat: For a secure hold, cut a small piece of floral foam and wedge it inside the opening of the witch hat. Then, gently press the foam-filled hat onto the top of the stick. I angled mine slightly to give it a whimsical, “crooked” look.
Step 6: The Final Rustic Touches
Now for the magic that makes it all come together! Let’s hide the floral foam and add those final layers of texture that give the topiary its truly rustic, organic feel.
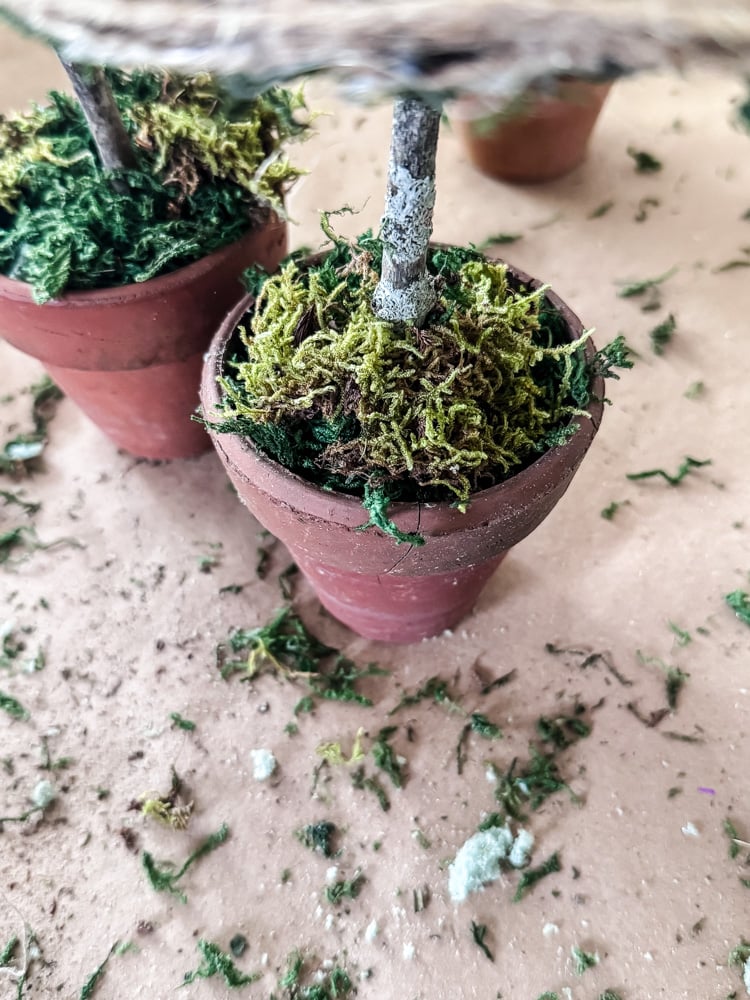
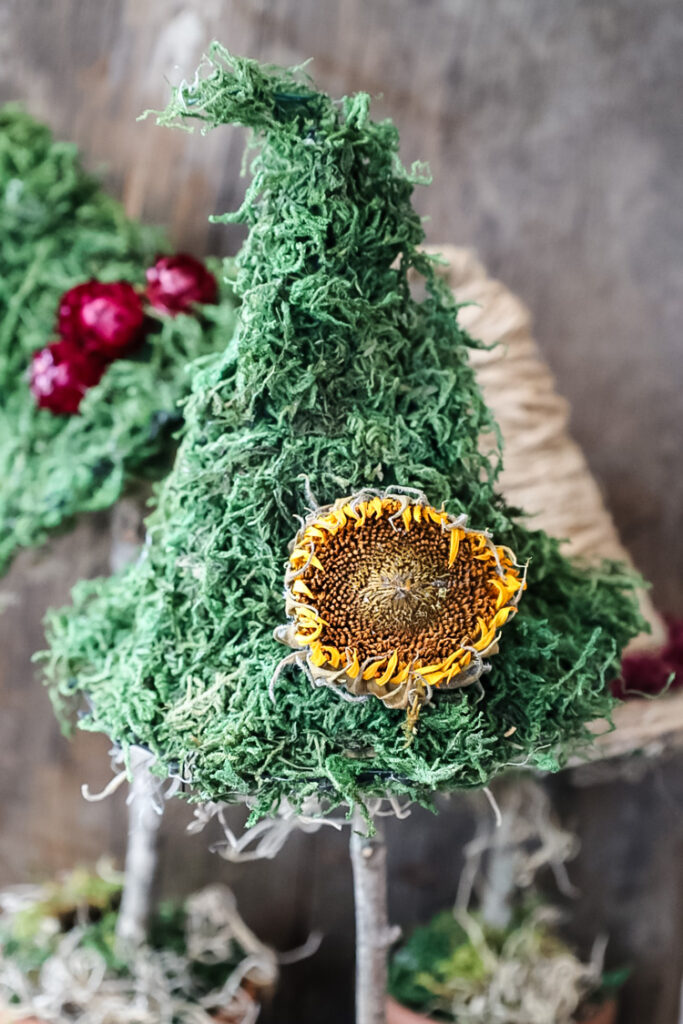
- Cover the Foam: Generously cover the floral foam in the pot with moss. I used a different shade of green moss here to add visual interest and depth. Don’t be afraid to mix textures!
- Add Spanish Moss: For even more dimension, tuck strands of Spanish moss around the edges of the pot, letting it spill over slightly for a soft, natural look.
- Embellish the Hat: To hide where the hat meets the stick and add a touch of fairy-tale whimsy, gently tuck small pieces of Spanish moss into the base of the witch hat. Let a few pieces hang out loosely for that perfectly “lived-in” rustic charm.
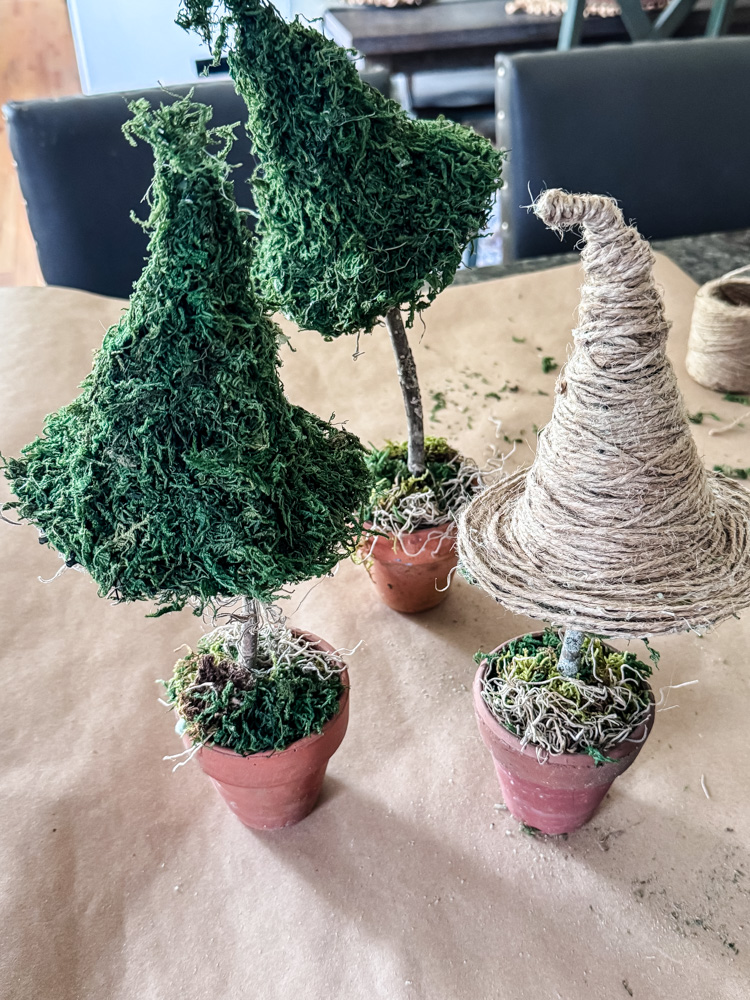
And You’re Done! (Or Are You?)
Look at that! Your rustic witch hat topiary is absolutely enchanting just as it is. You could stop right here and have a beautiful, natural piece of Fall decor.
But if you’re like me and can’t resist adding a little extra garden charm, the final step is where the real magic happens! Let’s embellish our hats with a few delicate dried flowers for a touch of soft, romantic color.
Step 7: Embellish with Dried Flowers (Optional Final Flourish!)
This is where your creativity truly shines! Adding dried flowers brings a soft, garden-grown charm to your topiaries. Here’s how I embellished each of mine:
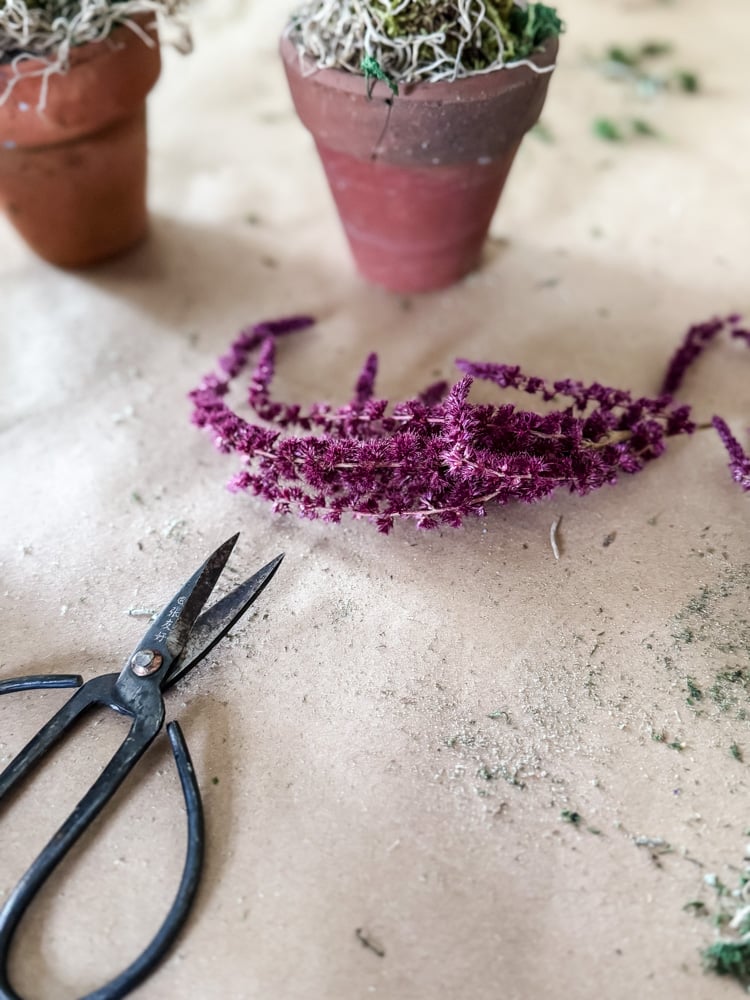
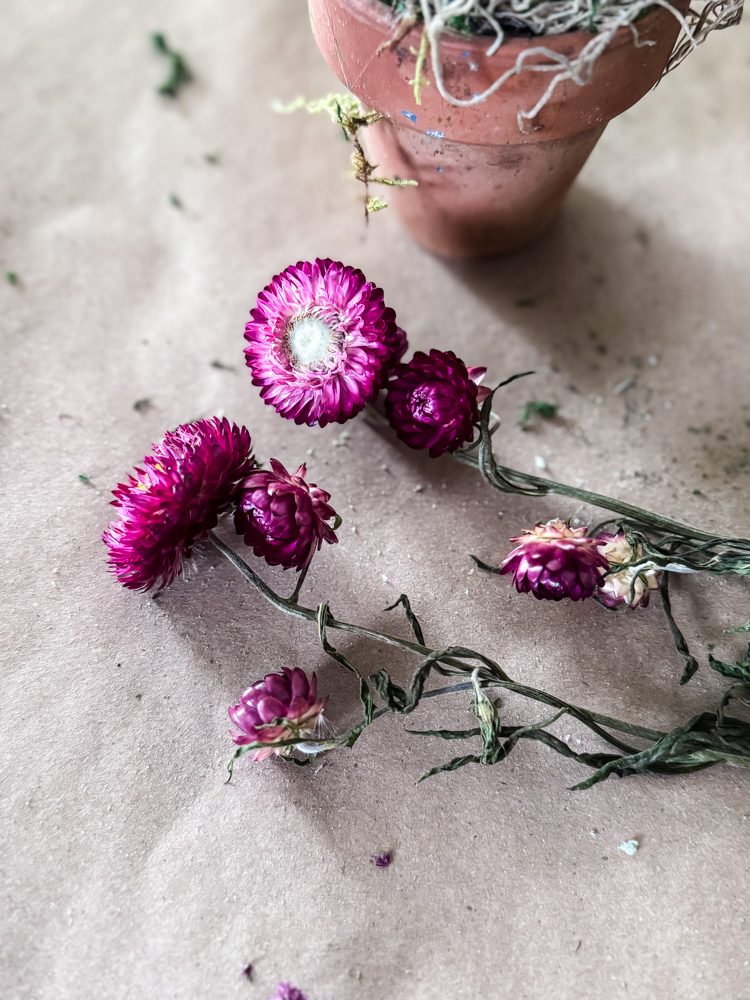
- On the Jute-Wrapped Hat: I created the illusion of a rustic ribbon by wrapping a ring of dried red amaranth around the base of the hat. The cascading blooms look like a beautiful, natural bow.
- On the Moss-Covered Hats: For a pop of cheerful color, I nestled a small dried sunflower onto one hat. On the other, I created a tiny cluster of three burgundy strawflowers for a more subtle, romantic touch.
How to Attach Them: Simply use your hot glue gun to carefully secure the dried flowers in place. A little glue goes a long way! Remember to let the glue cool slightly before handling to avoid crushing delicate petals.
Feel free to use whatever dried grasses, flowers, or even tiny pinecones you have on hand. This is your chance to make your topiary truly one-of-a-kind!
Your Enchanting DIY is Complete!
Step back and admire your work! You’ve transformed a few simple supplies into a piece of whimsical, rustic art!
And there you have it! From a sparkly Dollar Tree find to a charming, rustic piece of Fall decor, these witch hat topiaries are proof that a little creativity can truly work magic. Whether you placed yours on the porch, table, or gave it as a gift, I hope it brings a smile to your face every time you see it. Remember, the best part of DIY isn’t perfection,it’s putting your own unique spin on things.
Happy crafting, and may your home be filled with cozy, handmade charm this season!
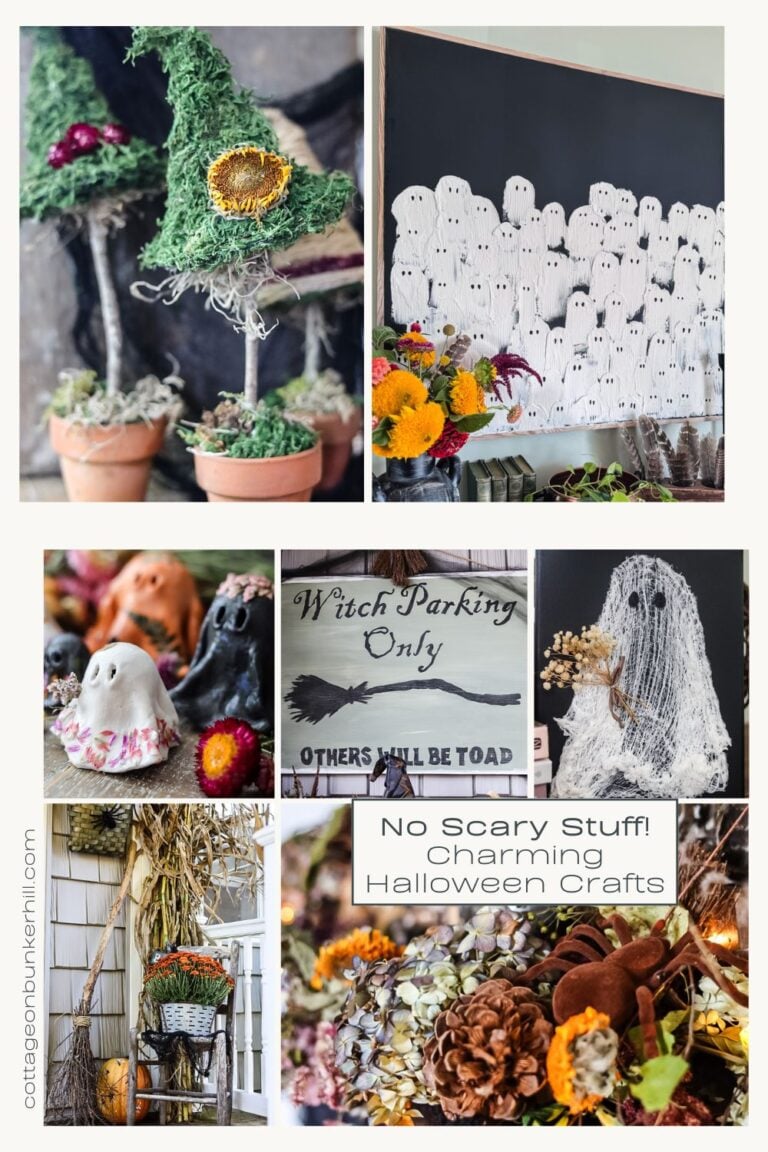
Check out some of my other flower-powered Fall craft ideas!
See your projects featured! If you are inspired by this or any of my other DIY projects, I would love to see them and add you to the Reader’s Spotlight gallery. Send a photo to me at jennifer@cottageonbunkerhill.com
xo, Jennifer
Love projects like this? Don’t miss out! Join my newsletter family for more cozy, budget-friendly DIY ideas delivered right to your inbox. You’ll get exclusive tips, early access to tutorials, and all the inspiration you need to make your home feel handmade and heartfelt.
my crafting must-haves
shop my amazon store


Friend, you outdid yourself. These are so darn cute! I can’t wait to share them in my weekly recap later today!
OMG so adorable!! Genius way to transform those cheap looking hats into masterpieces!
They are cute!! Thanks, I like this one too!