
There’s something so special about decor that walks the line between whimsical and wistful, don’t you think? As much as I love the classic jack-o’-lanterns and spooky skeletons, my heart truly belongs to pretty Halloween, a style that’s a little bit nostalgic, a little bit romantic, and utterly charming.
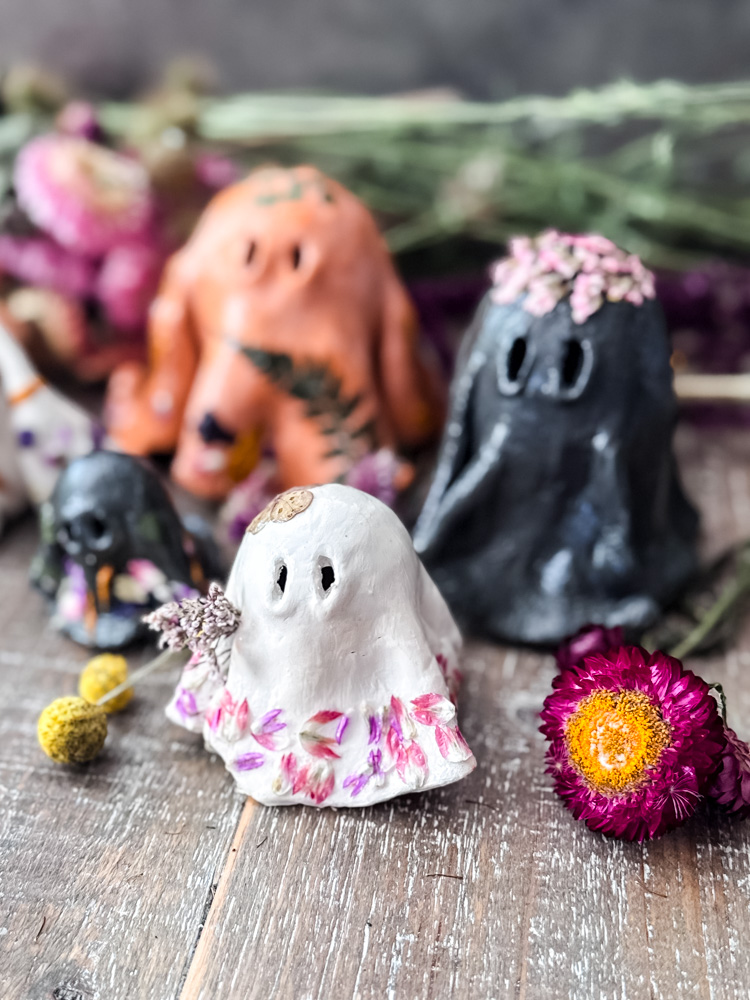
That’s exactly why I fell in love with the idea of these dried flower clay ghosts. They capture the playful spirit of the season without a single scare, making them the perfect accent for a mantel, a shelf, or even a Fall tablescape.
The best part? This project is surprisingly simple and incredibly forgiving. (I should know—I learned one very important lesson the hard way so you don’t have to! )
Pretty Dried Flower Ghosts (And the One Mistake You MUST Avoid)
If you’re ready to add a touch of ethereal, spooky-sweet magic to your home this Fall, let’s gather our supplies and make some gentle little spirits together.
Why You’ll Love This Project
This post may contain affiliate links, which means we receive a small commission if you purchase through our links. See our disclaimer page for more information.
What You Will Need:
A Note on Inspiration & Personalizing Your Ghosts
If you’ve seen this project floating around online, you’ve probably noticed most crafters use pretty printed napkins for their decoupage. It’s a fantastic technique!
But since I love to bring the garden indoors and use dried flowers in so many of my projects, it felt like a natural and beautiful choice for me to use delicate dried flower petals instead. This gives the ghosts a unique, organic, and ethereal look that I just adore.
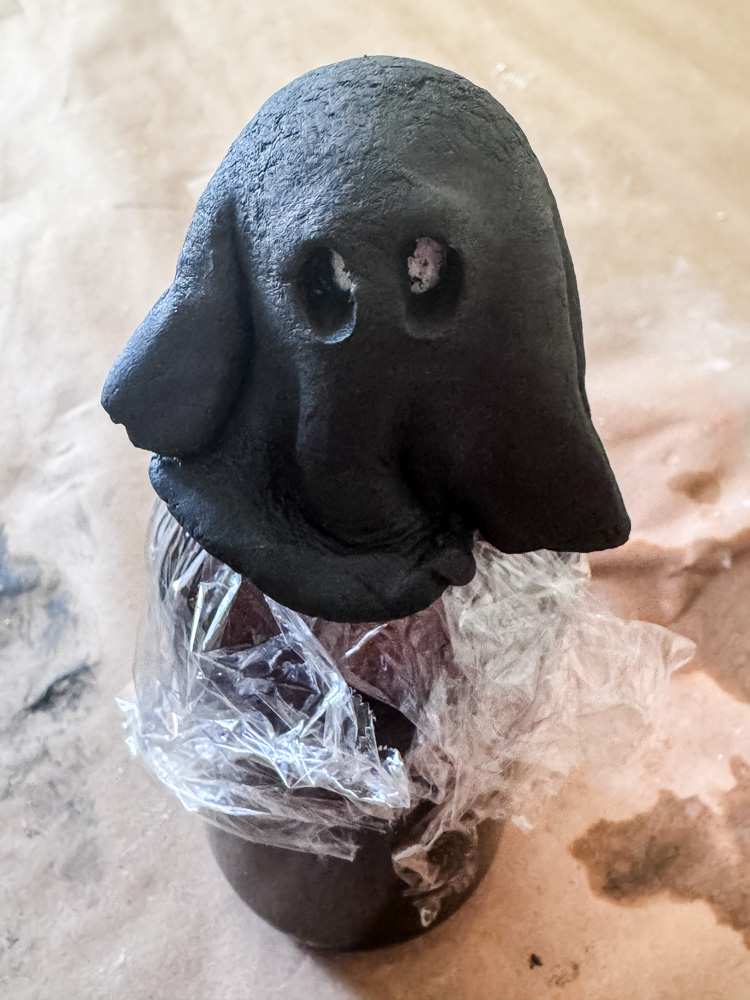
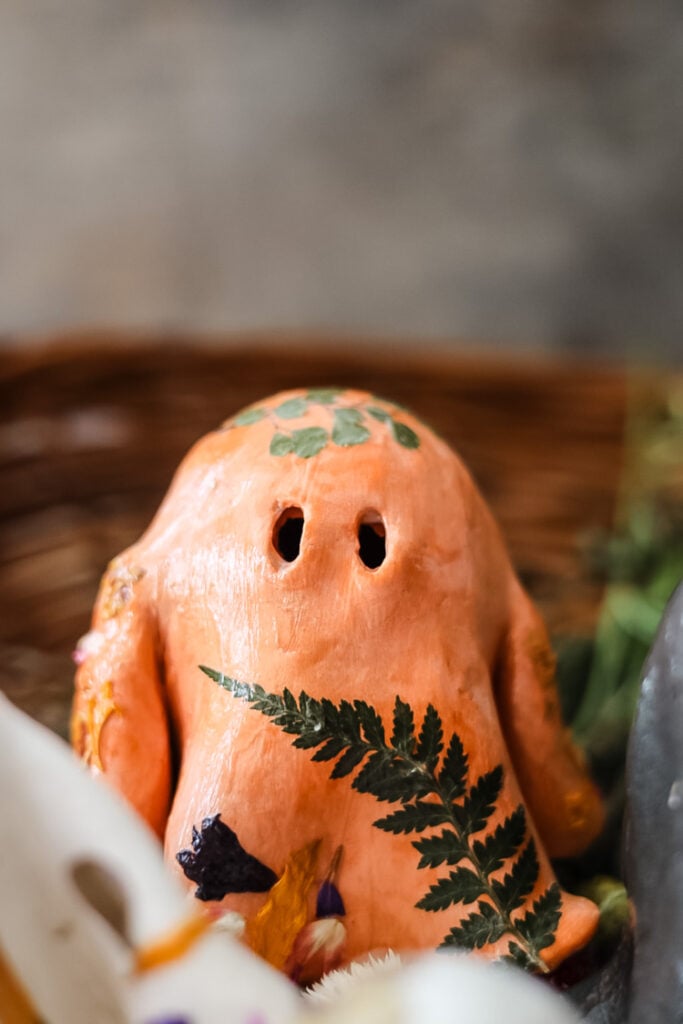
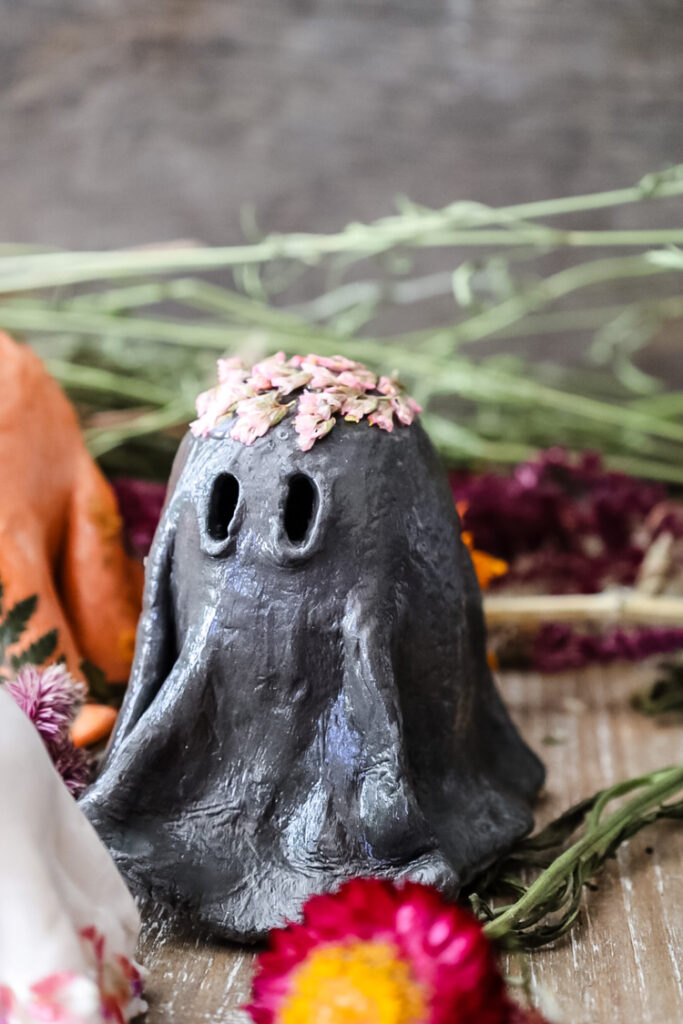
I also wanted to play with the classic ghost color palette. While traditional white is always charming, I loved the idea of a more earthy, autumnal terracotta and a spooky, elegant black to show how versatile this DIY can be.
The supplies you’ll need are minimal, and most are probably already in your craft stash!
Materials for this Project
- Air-Dry Clay (I used Crayola in White, Crayola in Terracotta, and Pepy European in Black)
- Assorted Dried Flower Petals (I used petals from my garden)
- Glossy Mod Podge
- Small Paintbrush (for applying the Mod Podge)
- Styrofoam Balls (I used 1.5-inch & 2-inch sizes)
- Small Bottles or Jars (Spice jars or small bottles work perfectly to act as a stand for the styrofoam balls)
- Plastic Wrap (To prevent the clay from sticking to the forms – essential!)
A Quick Note on Forms: I’ve also seen people use scrunched-up aluminum foil to form the ghost heads, though I personally haven’t tried it.
Clay Ghost: Step-by-Step Tutorial
Let me walk you through each step of making these air-dry clay ghosts. I want you to be confident in making a set on your own and have all the info to refer back to.
Step 1: Gather Your Forms & Choose Your Size
The beauty of these little ghosts is that you can create a whole charming family in different sizes! For my ghosts, I used:
- 1.5-inch styrofoam balls for larger, statement ghosts.
- 2-inch styrofoam balls for smaller, accent ghosts.
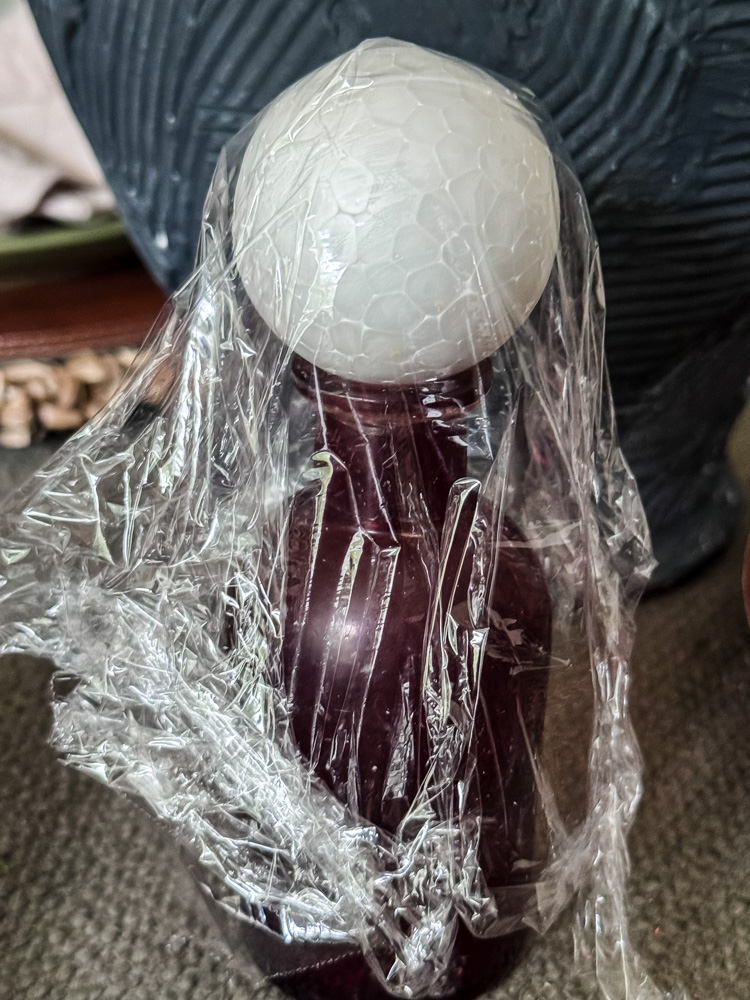
Here’s the key to the setup: You need a stable base to hold the styrofoam ball while the clay dries. I found that small glass bottles or sturdy spice jars were the perfect fit. Simply balance the ball on top of the jar.
Prevent Sticking!
Before you even touch your clay, drape plastic wrap over the styrofoam. This creates a barrier so your clay doesn’t stick to the forms, making removal so much easier later on. Trust me, you don’t want to learn this one the hard way!
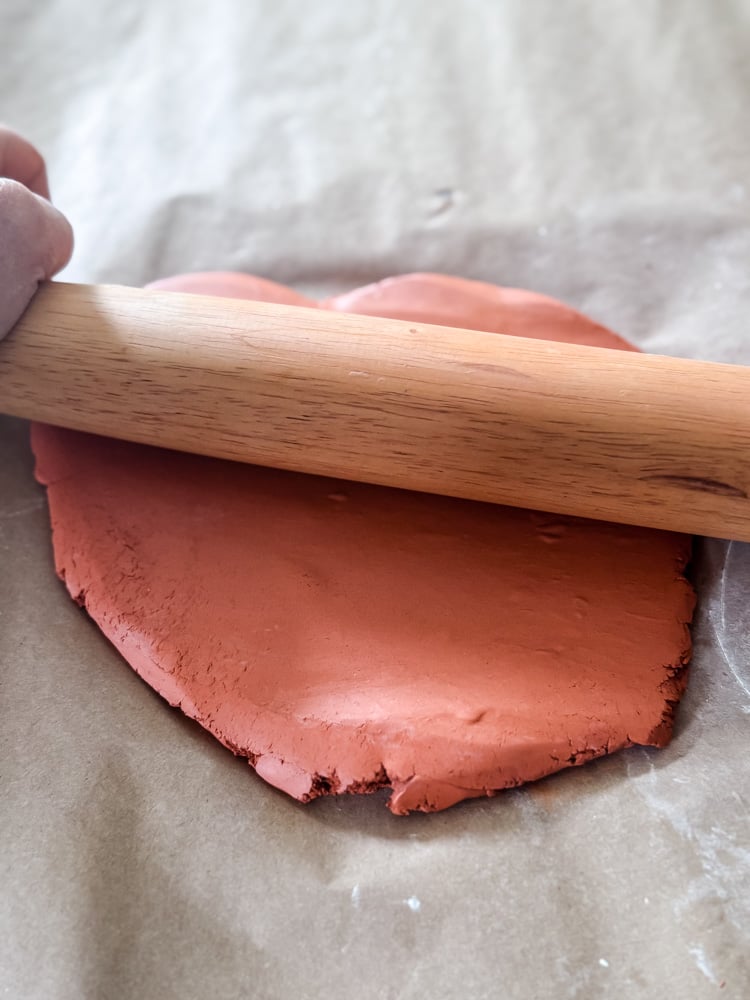
Step 2: Roll & Cut Your Clay Circles
Before we start shaping, we need to prep our clay. The goal is to create smooth, even circles that will drape perfectly over our forms.
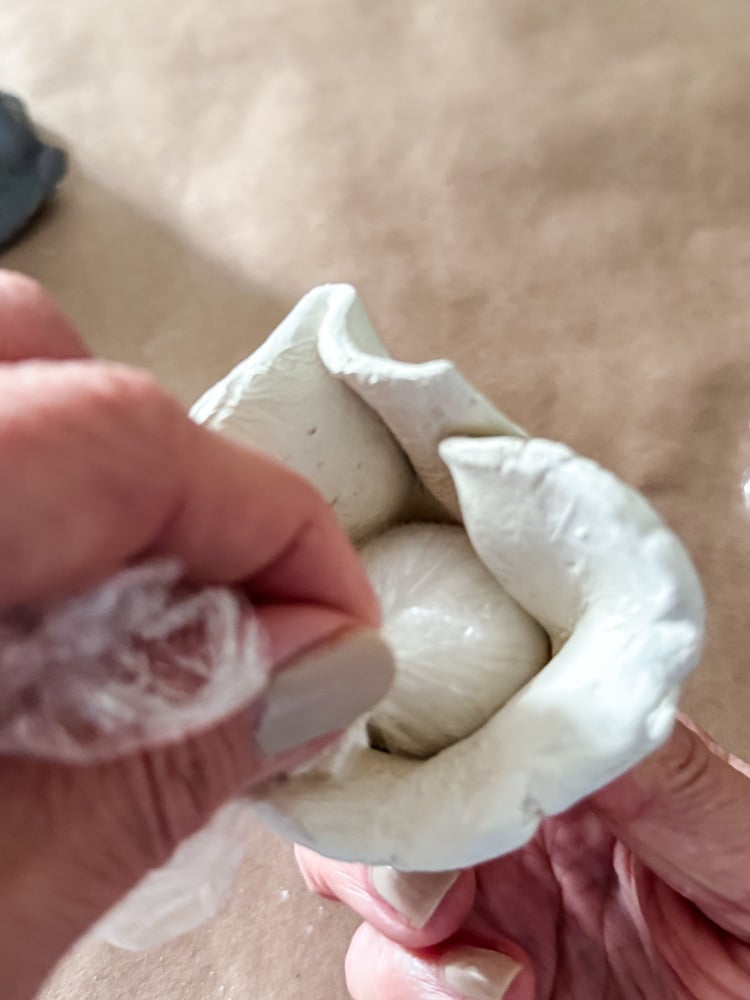
- Work in Sections: Take a portion of your clay (enough for one ghost) and knead it in your hands until it’s soft and pliable.
- Roll it Out: On a clean, flat surface, use a rolling pin (or even a glass bottle!) to roll the clay to an even thickness. Aim for between 1/8-inch to 1/4-inch thick.
- Pro-Tip: My larger ghosts (using the 2″ ball) were closer to 1/4-inch thick for extra stability, while the smaller ones were a bit thinner. The most important thing is that the thickness is consistent across the circle to prevent cracking as it dries.
- Cut a Circle: You can freehand a circle shape, or use a bowl or lid as a guide. Aim for between 7-9 inch circle of clay.
Step 3: Shape the Ghosts & Add Details
Now for the most creative part—transforming those clay circles into whimsical spirits!
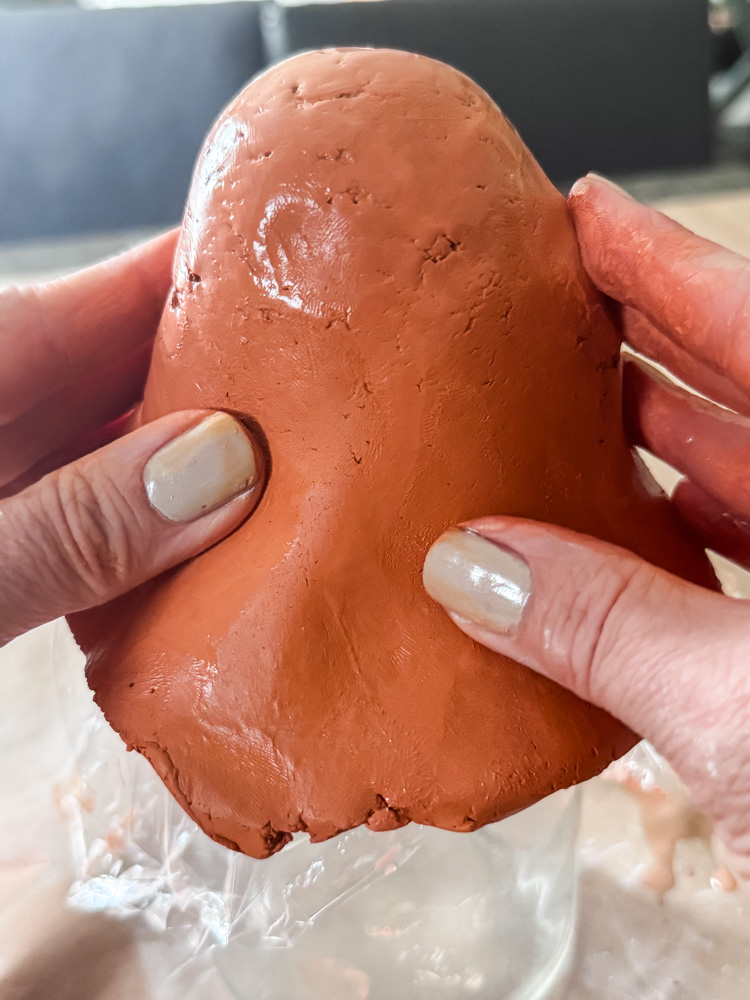
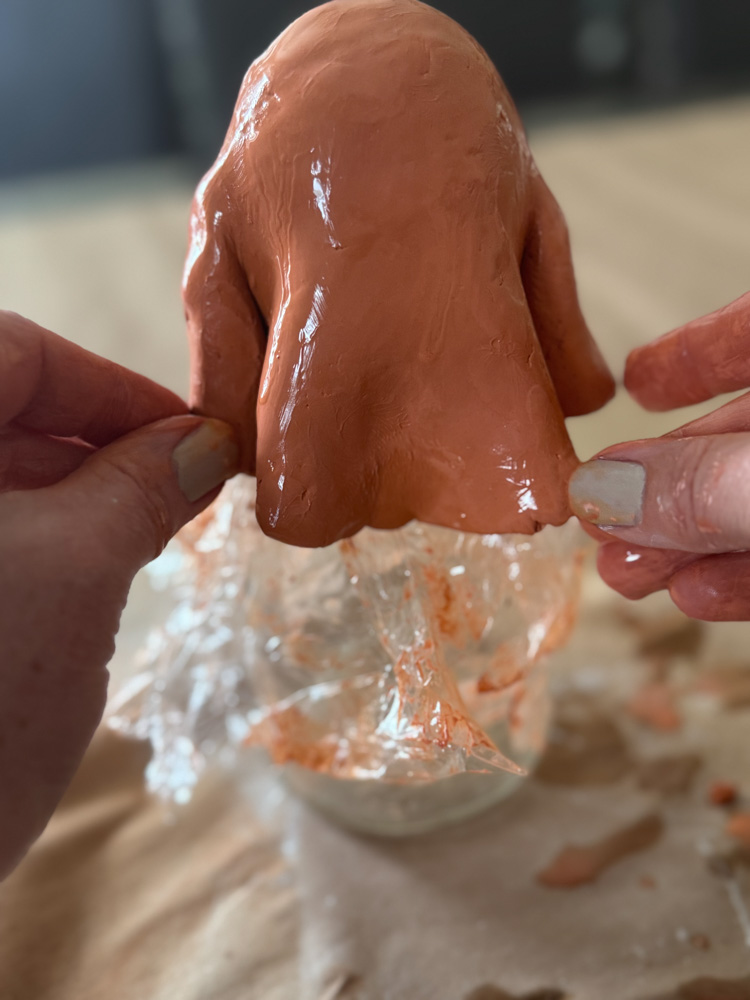
- Drape the Clay: Gently lift your clay circle and drape it over your plastic-wrapped form.
- Create the Ghostly Skirt:
- Ruffle and Shape: Use your fingers to gently pinch and ruffle the bottom edges of the clay to create soft, irregular folds. This gives the ghost movement and character!
- Trim the Excess: If the “skirt” is too long or bulky in places, use small scissors to carefully trim away the excess clay. Don’t worry about it being perfect—the irregularities make it look more natural.
- Smooth the Seams: Keep a small cup of water nearby. Dip your fingers in water to smooth out any rough seams, blend your cuts, and perfect the ruffles. The water acts as a glue and creates a beautifully smooth finish.
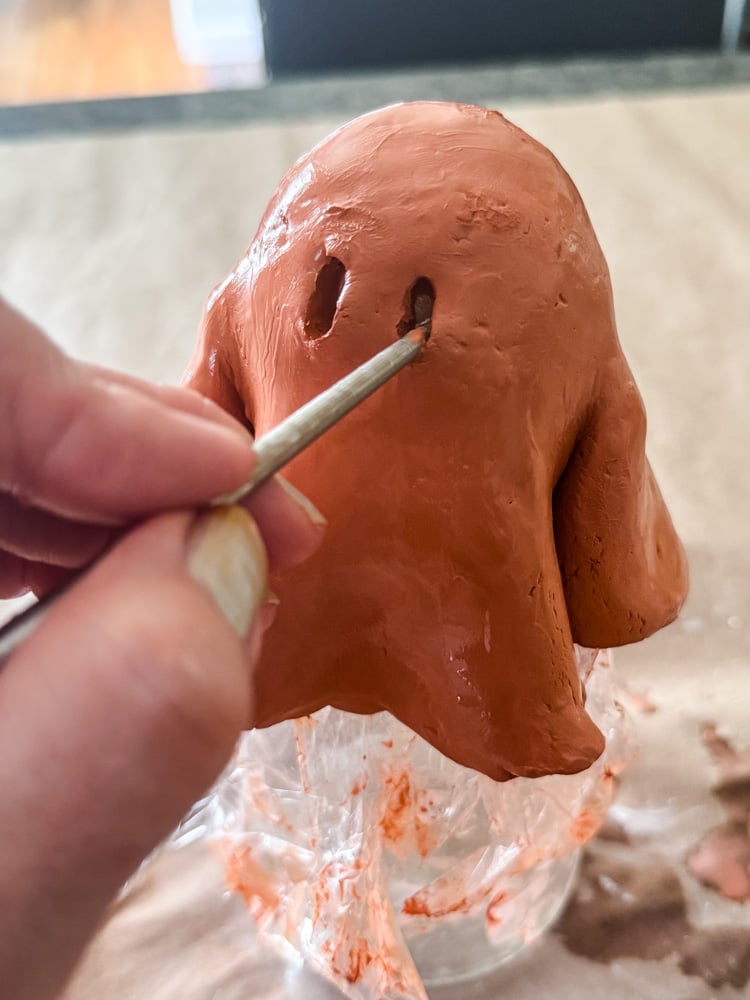
- Make the Face: Use the end of a chopstick, paintbrush, or a clay tool to gently press two small holes for the eyes. You can make them round, oval, or even surprised little circles!
- Add Special Features (Optional): For one of my smaller ghosts, I wanted it to hold a tiny bouquet. Before the clay dried, I used my chopstick to pierce a small hole near where an “arm” would be. After it’s dry, I’ll be able to thread a tiny bundle of dried flowers through it!
Once you’re happy with your ghost’s shape and personality, it’s time to let it dry. Figure 1-2 days, depending of the thickness of the clay and your weather.
My Big Mistake (& How to Avoid It!)
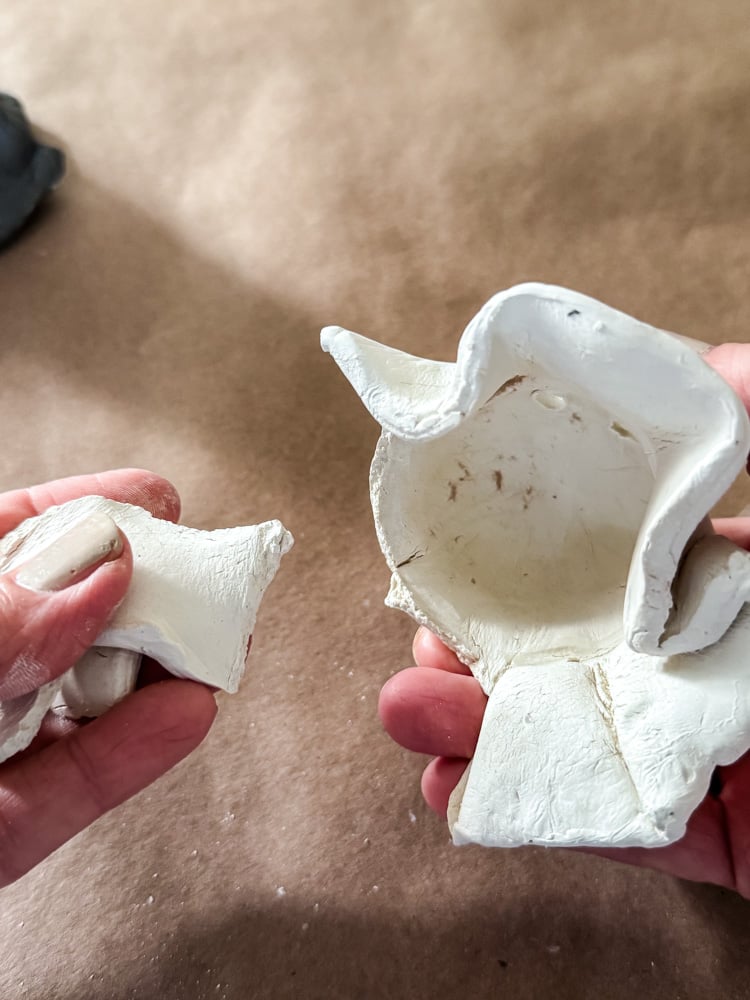
I have to be totally honest with you- I learned this lesson the hard way! On my first attempt, I made a classic beginner’s error: I let the clay ghosts dry completely on the forms.
When I went to remove the styrofoam balls, some were stuck inside the hardened clay heads. I actually broke one of my cute little ghosts trying to yank the form out! It was a total heartbreak moment.
Some came out easily if the clay had shrunk enough, but others were firmly trapped. For a couple, I had to carefully use sharp snips to break the styrofoam ball into pieces inside the head to get it out without destroying the clay.
The Fix: The Perfect Timing for Removal
I remade the broken ghost and figured out the perfect solution. Here’s the pro-tip to save you all the hassle:
- Let the clay dry on the form for just 2-3 hours first. This allows it to set and become firm enough to hold its own shape and not collapse under its own weight.
- Gently test it: After a few hours, the clay should be leather-hard—not wet and malleable, but not fully dry and brittle. At this stage, you should be able to gently twist and remove the styrofoam ball easily without any resistance.
- Then, let the hollow ghost sit freely to finish drying completely overnight.
This simple timing trick makes all the difference between a perfect ghost and a heartbreaking break!
Step 4: Prepare Flowers & Gather Supplies
This is where your ghosts get their unique, beautiful personalities! The decoupage process is simple but requires a gentle touch.
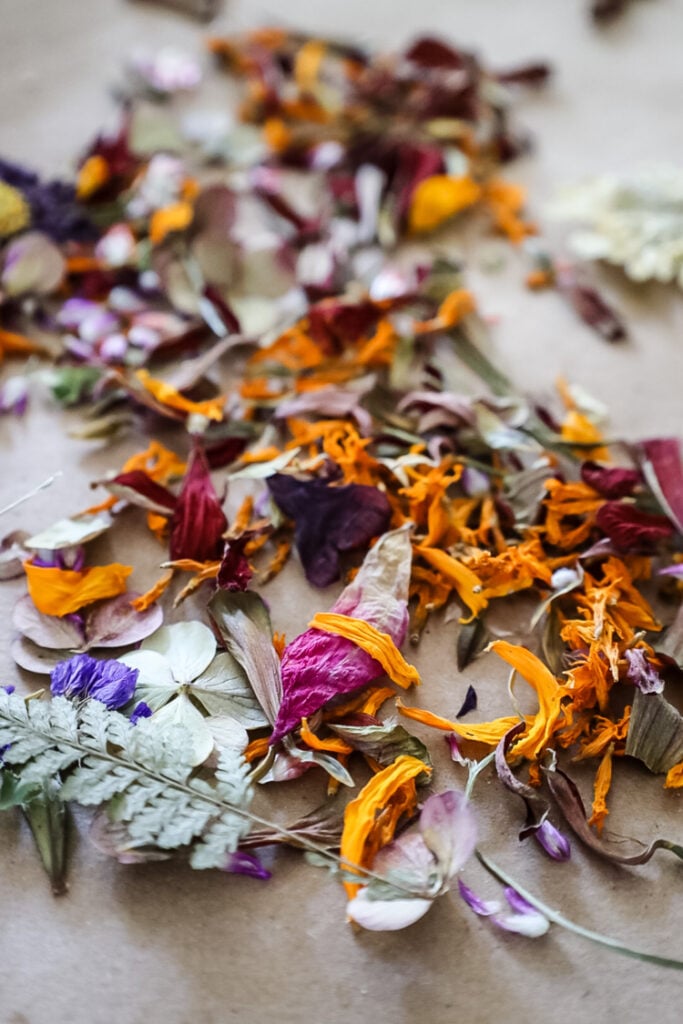
Choosing Your Flowers:
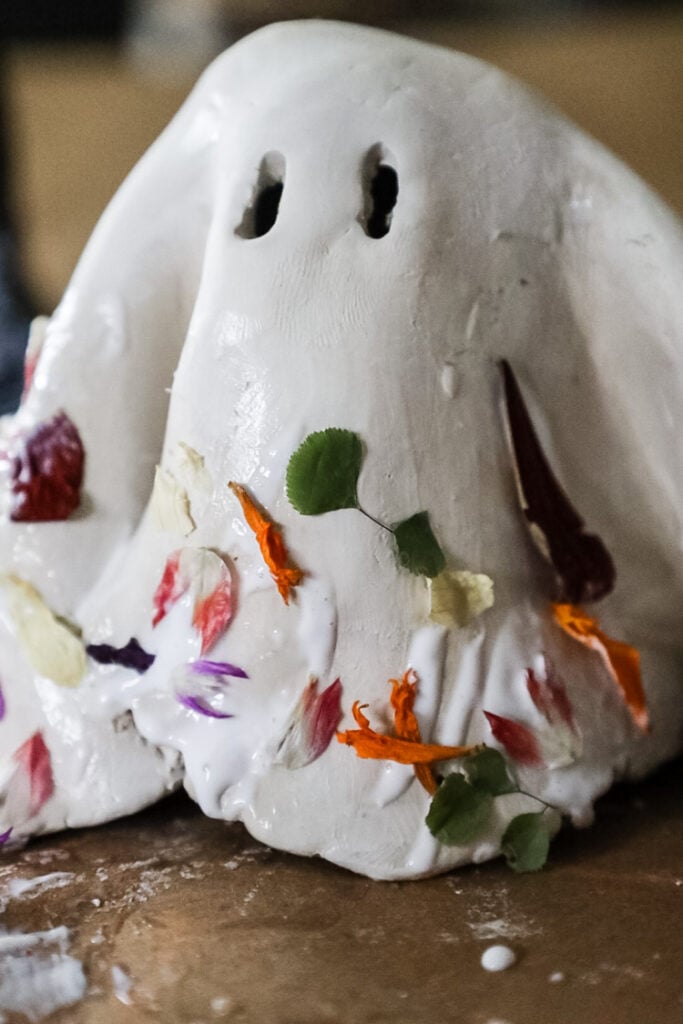
First, a note on materials: any small, thin, dried petals will work beautifully. I used a variety from my garden, including zinnias, sunflowers, hydrangea and marigolds. For larger flowers, like the zinnia petals I used, I found it worked best to gently break them up into smaller pieces so they would lie flat against the curved clay surface. I also used a few small fern pieces.
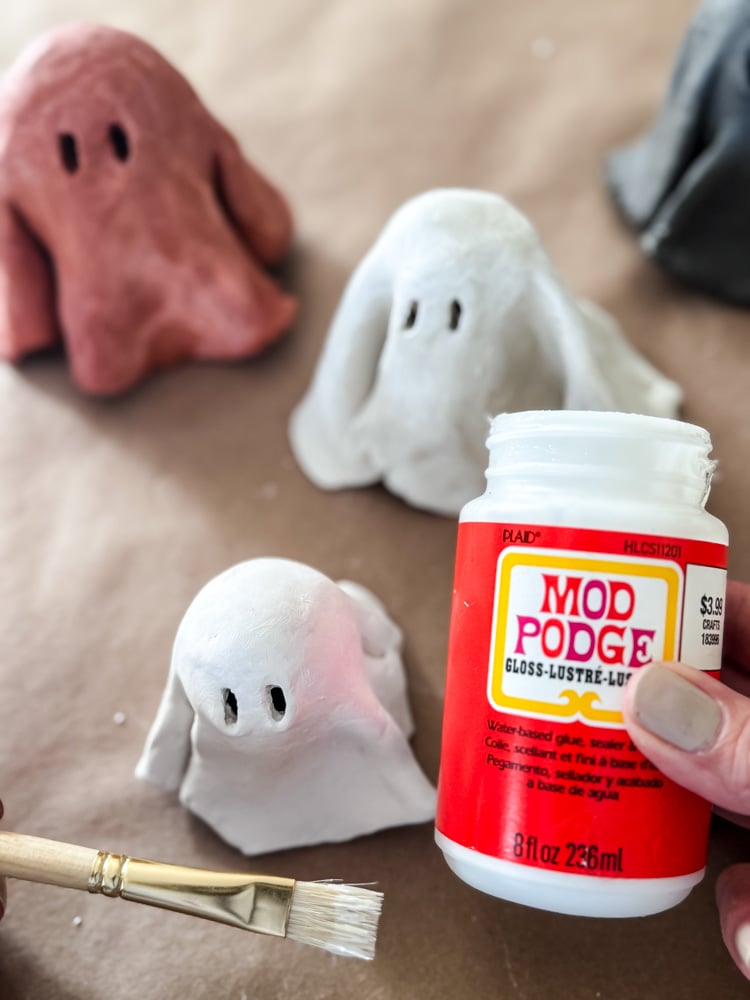
Cover your work surface with newspaper/kraft paper to prevent a sticky counter! You will also need Mod Podge & a small craft brush. For this project, it’s important to use glossy Mod Podge. It will create that beautiful sheen of ceramic pottery.
Step 5: Decoupage The Ghosts with Flowers
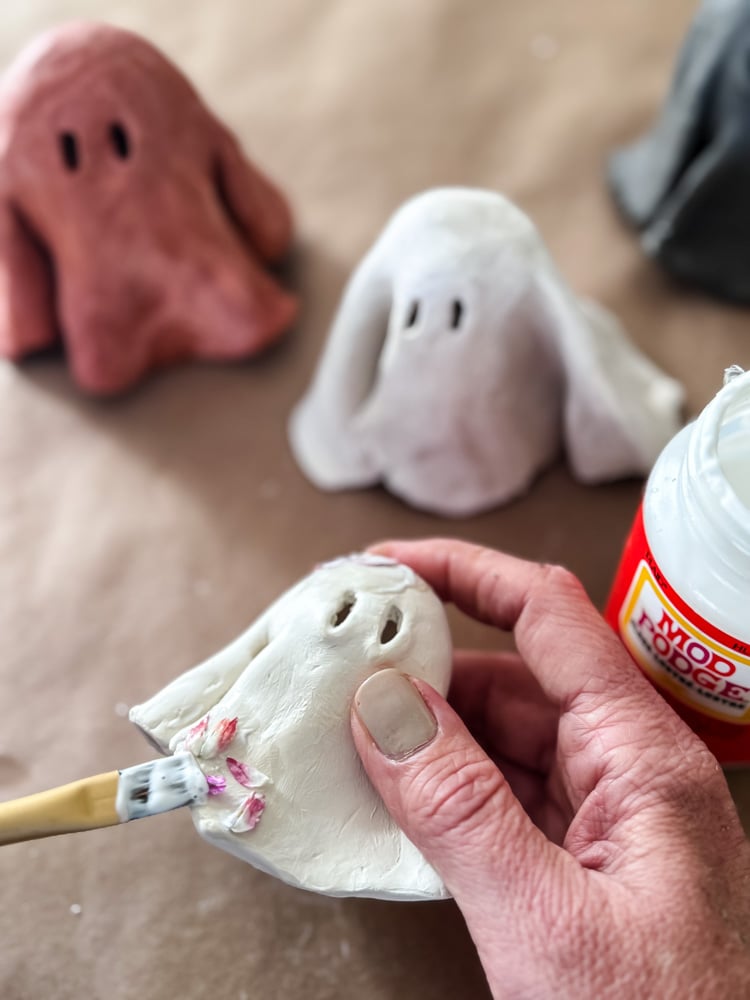
- Apply the Base Layer: Using a small paintbrush, apply a thin, even layer of glossy Mod Podge to a small section of the ghost. It’s best to work in small areas so the glue doesn’t dry before you place your flowers.
- Place the Petals: Using tweezers, carefully place your dried flower petals onto the glued section. Gently press them down with your fingers or the back of the tweezers to ensure they are fully adhered and there are no air bubbles.
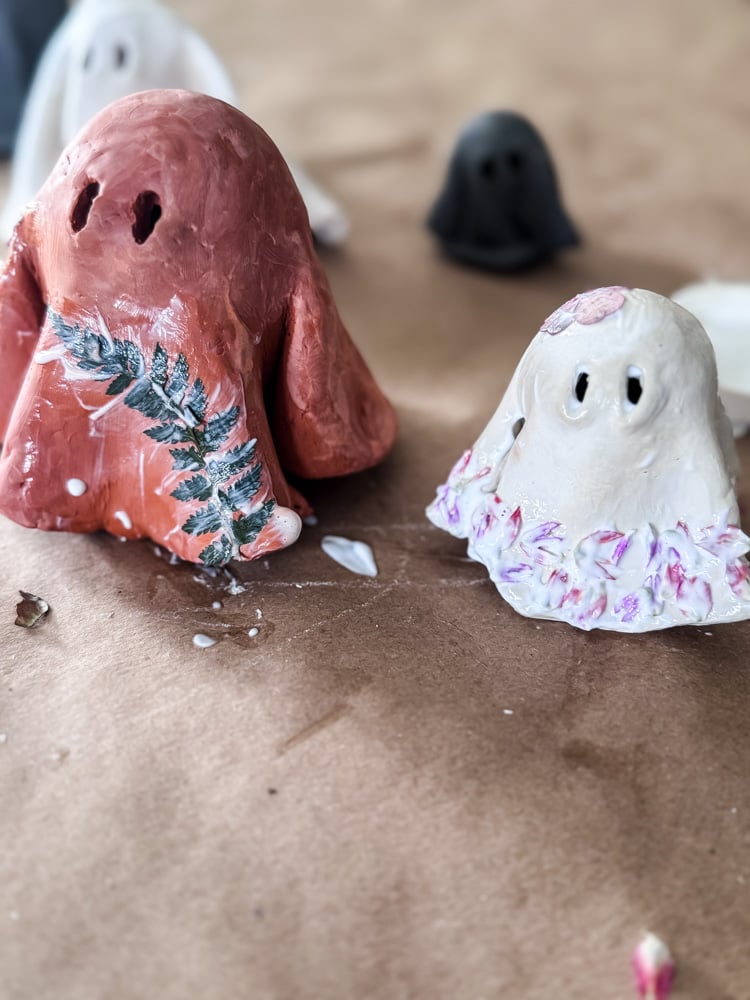
Get creative and have fun! I just tried to make each ghost look a little different. For my terracotta clay ghost, I used small pieces of pressed ferns and a few flowers.
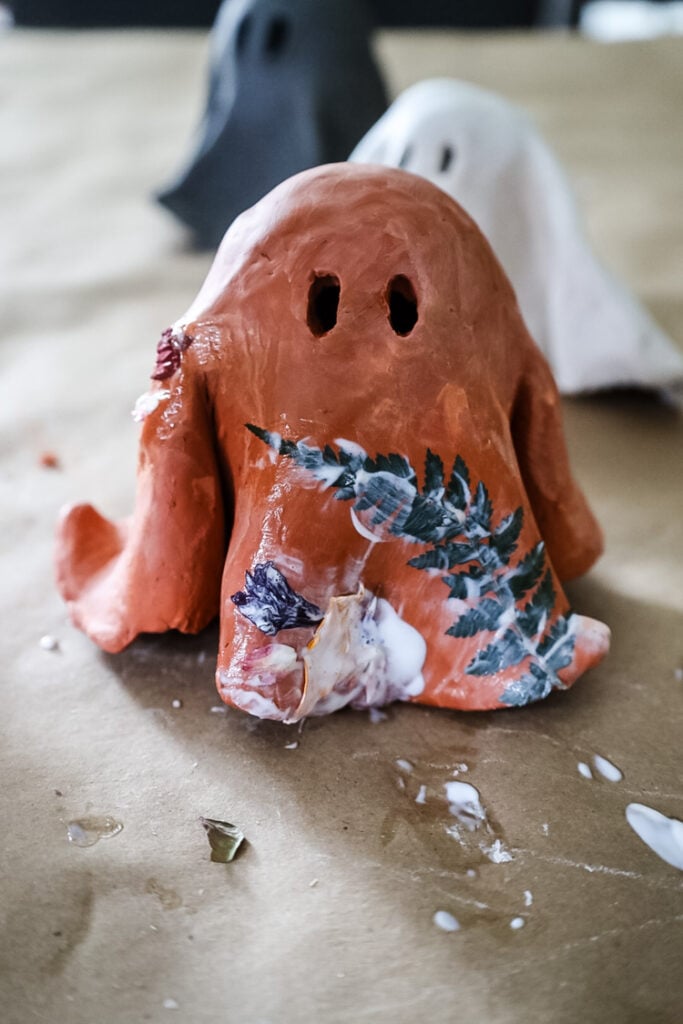
It really does help to use tweezers to adhere the small pieces of flowers to the clay ghosts. I did still get sticky fingers, though!
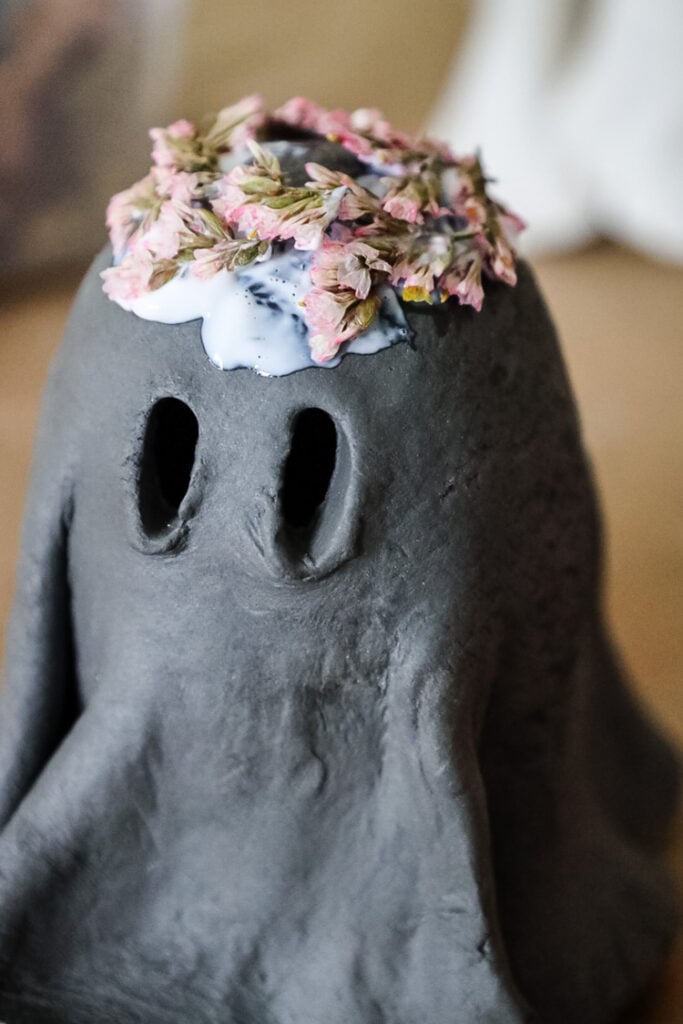
On the larger black ghost that I made, I created a flower crown with bits of pressed pink waxflowers that I had in my stash.
Once your ghost is sufficiently covered with flowers:
- Let it Dry Completely: This is the most important tip! Allow this first layer to dry completely before moving on. I let mine sit for about an hour. If you try to brush another layer on top while the first layer of Mod Podge is still wet, you risk dislodging or tearing the delicate flowers.
- Seal the Flowers: Once the first layer is fully dry, gently brush a second thin, sealing layer of Mod Podge over the top of the flowers and the surrounding clay. This will lock them in place and give them that gorgeous, dewy shine. You may want to add two sealing coats for extra protection, allowing drying time between each.
- Repeat: Same process for each ghost
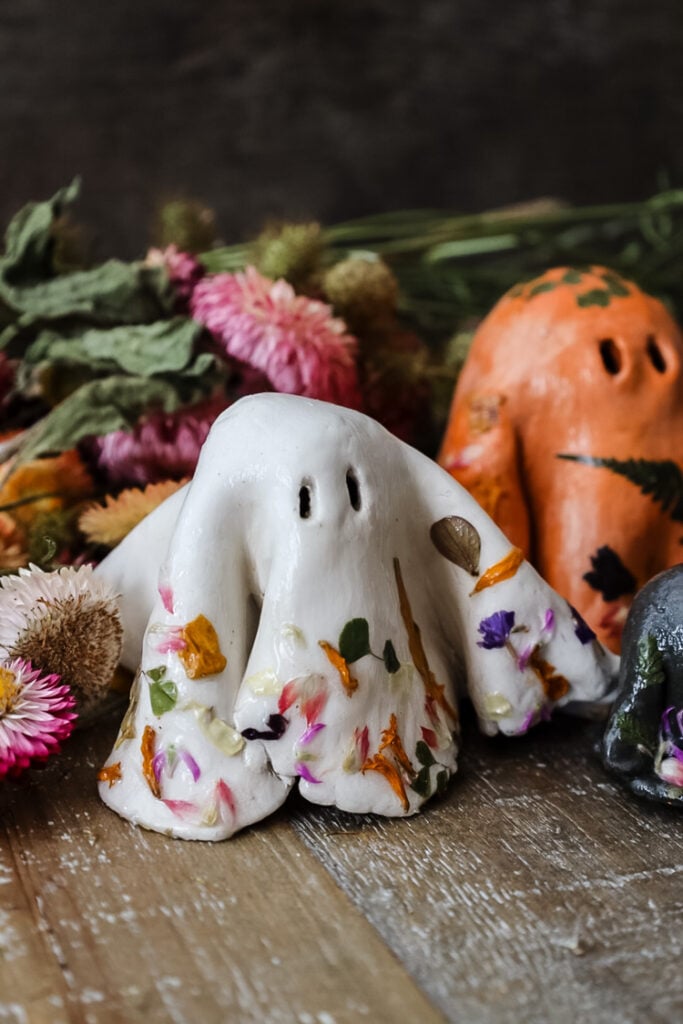
The Reveal: Your Spooky-Sweet Masterpieces
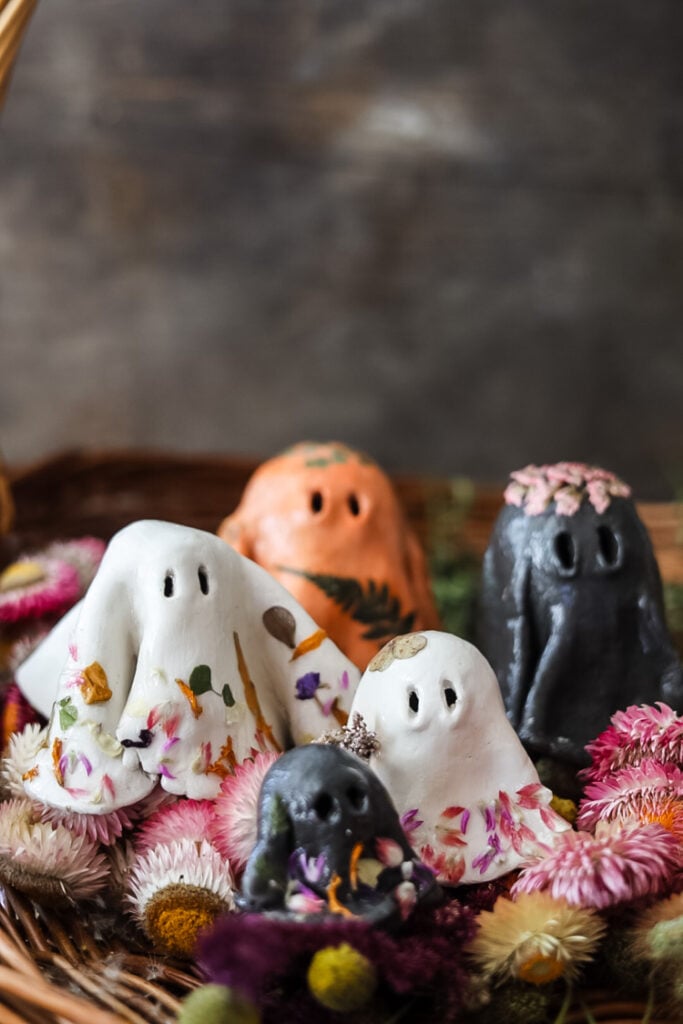
And just like that, you’ve transformed simple clay and garden leftovers into the most enchanting Halloween decor! I am absolutely in love with how my little ghost family turned out. Each one has its own personality, from the classic white spirit to the earthy terracotta phantom and the elegantly gothic black shade.
The dried flowers add such a unique, delicate touch that makes these ghosts truly special. They look beautiful arranged together on a mantel, scattered down a dining table as part of a centerpiece, or peeking out from a bookshelf.
Pro tip: pop a battery-operated tea light inside the hollow ghost or run a small string of fairy lights. The light will glow from their cute ghost eyes!

Now It’s Your Turn!
This project is proof that Halloween decor can be graceful, whimsical, and personal. It was such a joy to make these, and I hope you felt the same creative magic while making yours.
I would be thrilled to see your beautiful creations! So I can celebrate your spooky-sweet spirit along with you. I would love to see them and add you to the Reader’s Spotlight gallery. Send a photo to me at jennifer@cottageonbunkerhill.com
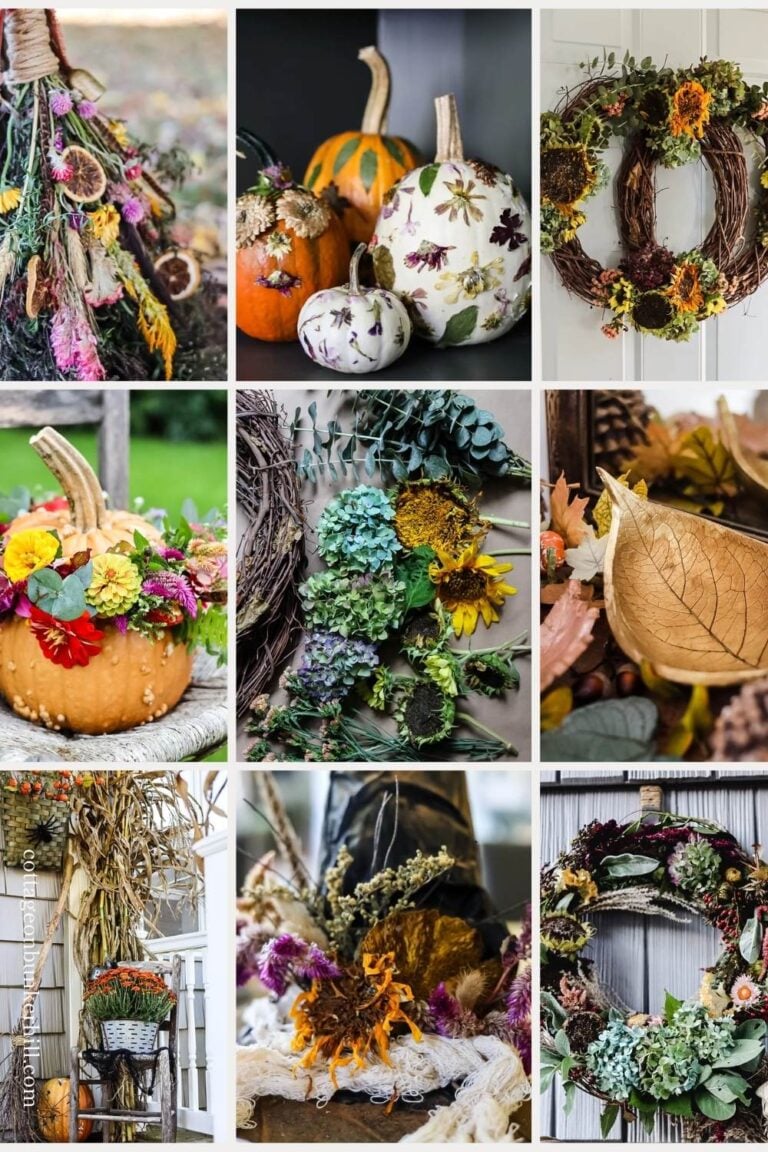
Looking for more pretty flower-powered Fall decorating DIYs? Check This Out!
Happy crafting, and Happy Fall!
xo, Jennifer


This is the cutest fall DIY! I love it!
Boo! I love them too!
Love this project! They are cute and spooky!